• Welcome
  • About
  • Workshops
  • FOOD FOR BLOG
  • Contact
Menu

The Cultural Kitchen

Street Address
City, State, Zip
Phone Number
COOKING CLASSES ON DEMAND

Your Custom Text Here

The Cultural Kitchen

  • Welcome
  • About
  • Workshops
  • FOOD FOR BLOG
  • Contact
Brushes Mercado-1.jpg

FOOD FOR BLOG

Recipe testing gone wrong in the very best way: Cajeta con Nuez

December 23, 2022 Maria Garza

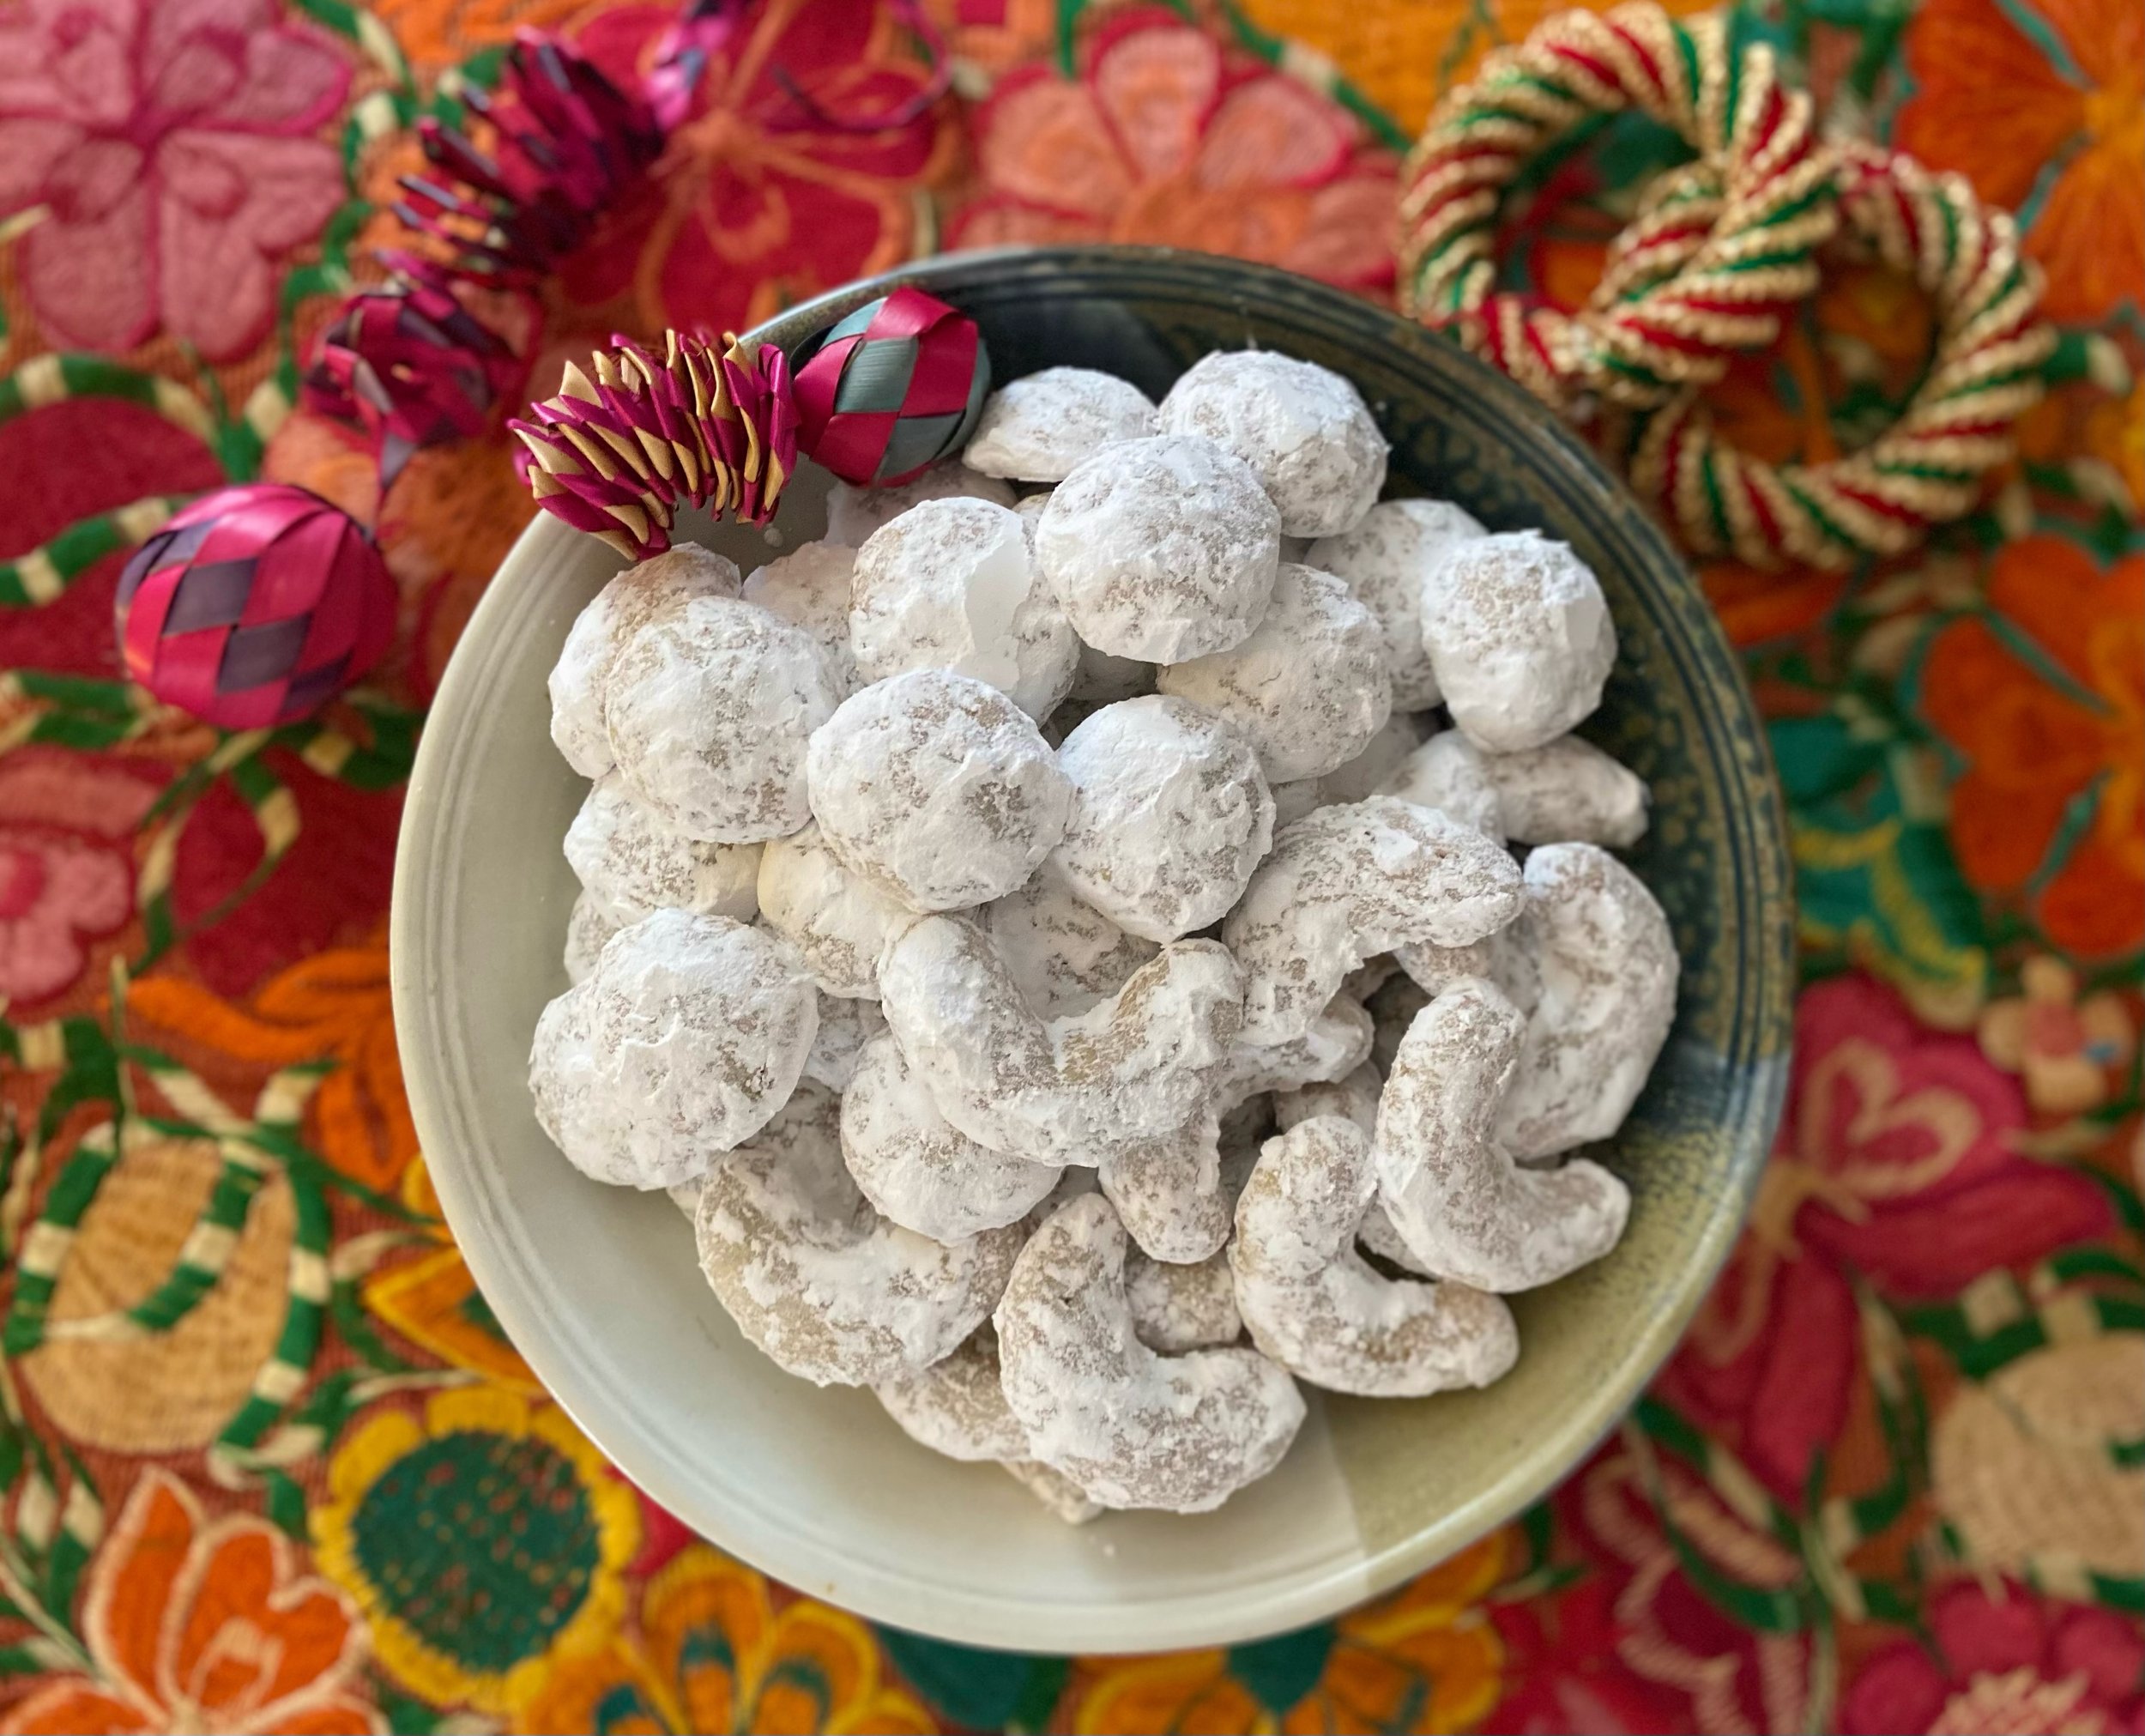
I have been wanting to test a recipe for Glorias estilo Linares for a while. Partly because it is a very delicious sweet from my region of Mexico, but also because they are very hard to obtain in Canada.

This month I was determined to make some for Christmas and after doing my research, I came up with a recipe I thought would work just fine.

I have been making candy and working with sugar for quite a few years, so I thought I could ace this no problem. Well, it turns out, it is a bit more difficult than I thought! The recipe started out nicely, but when it came to finishing the candy and taking it to the exact ball stage, I missed the mark by a few degrees. And a few degrees can mean a lot!

The problem is, during all my research I never came across any texts giving the exact temperature, so I tried to guess the best I could using the clues other cooks have given. Unfortunately, my recipe did not reach the correct temperature, therefore it did not harden as expected.

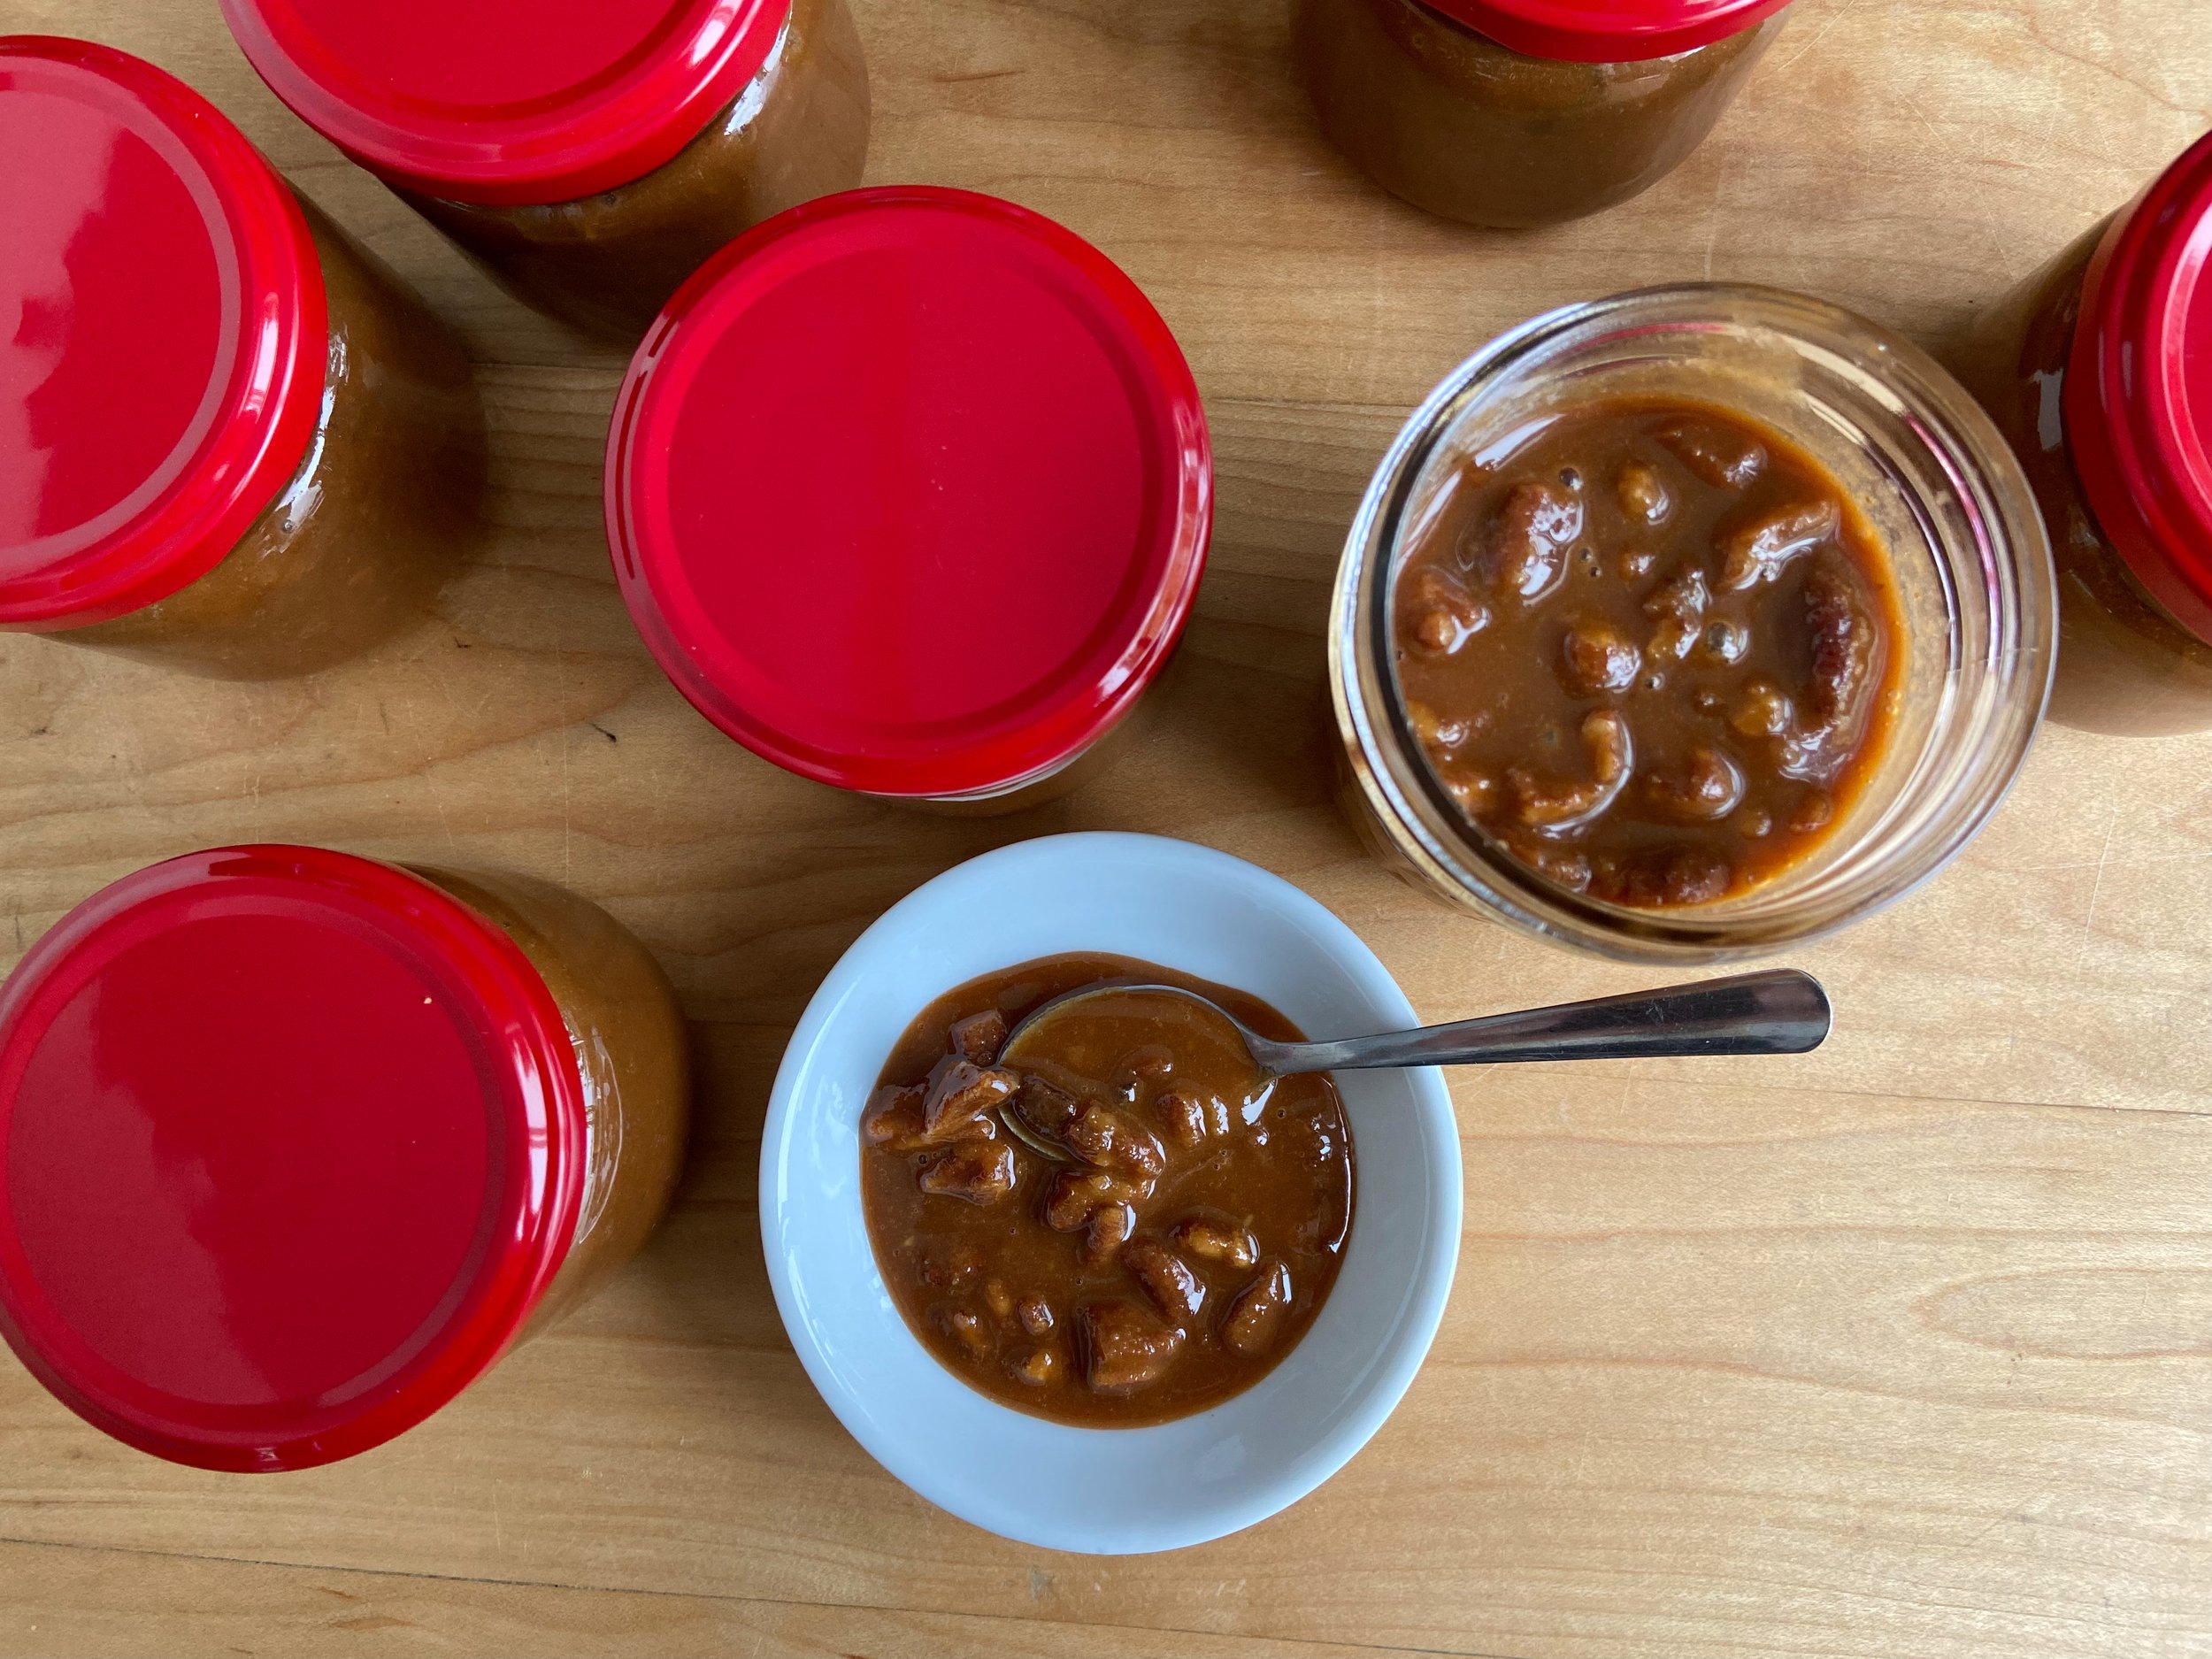
While this is a disappointment, it is not unexpected. As a product development chef, I am used to trying, trying and re-trying recipes multiple times until I they come out right. And though this recipe did not come out the way I wanted it to, it is by no means a waste, as it is a delicious Pecan Cajeta that can be used in multiple ways, so I decided to share the recipe with you. As for the Glorias, I will keep trying until I get them right!

Cajeta in Mexico is always made using goat’s milk, or a combination of cow and goat’s milk. The goat milk gives this caramel sauce its distinctive tang, but if you can’t find it or don’t like it, use cow’s milk instead. I love pecans in everything, and obviously I had added them thinking this recipe would become Glorias (which have pecans), but if you would prefer to keep this nut free, feel free to omit them.

This sauce can be used to top your favourite waffles, pancakes, pound cakes, ice cream, etc. You may want to warm it up slightly before serving, as cajeta tends to get a bit grainy as it sits.

Cajeta con Nuez
Dulce de Leche with Pecans

4 cups whole cow’s milk
4 cups goat’s milk
5 cups granulated sugar
2 tsp vanilla extract
5 Tbsp corn syrup, liquid glucose, honey or maple syrup
1 tsp baking soda
2 1/4 cups coarsely chopped toasted pecans
Pinch of sea salt

In large heavy Dutch oven, place goat milk, cow milk, sugar, vanilla and corn syrup.

Bring mixture to a slow boil, stirring so sugar dissolves.

Once it comes up to a boil, add baking soda and continue stirring, increasing and decreasing heat so mixture does not boil over. You cannot leave it unattended or it will do just that. You have to stir very often to make sure milk does not scorch.

Cook until mixture starts to thicken - this will take more than an hour, increasing and decreasing heat as needed and stirring frequently until mixture turns a medium dark colour, is bubbling vigorously, is thick and it coats the back of a spoon. If you have a probe thermometer, the mixture should reach 226° - 227°F.

Turn off heat and let mixture cool down for 30 minutes.

Mix in chopped pecans and salt and then pour mixture into a smaller bowl to let cool completely. Spoon into glass jars. Keep refrigerated.

Makes about 6 cups.

Comment

From Chef Pepe Hernández' kitchen, these tamales are delicious!

December 19, 2022 Maria Garza

After years of Instagram conversations, this Fall I finally met Chef Pepe Hernández in person. Pepe is the owner of Yokot’an, an amazing restaurant in Monterrey (Garza García), México that showcases Chef Pepe’s roots and love of food from his native Tabasco.

If you ever have a chance to go visit, please order an Infladita de Piloncillo, one of the best items on Yokot’an’s menu - it’s a fried puffy tortilla filled with Cochinita Pibil and it is just outrageously good. Pepe made it for my sister’s birthday on our last visit and it is just amazing. We have tried quite a few items off his menu, and everything has been delicious. I particularly remember some Tostones with Cochinita that we devoured in no time, some Enmoladas, one of the Chef’s best and his French Toast, not too sweet but completely decadent. I also remember an Horchata con Café that was really refreshing, something I had never tried before.

But one of the things Chef Pepe is known for are his tamales, and that is what actually gave him his start. Before he opened the restaurant, he used to make tamales and sold them at San Pedro de Pinta, an outdoor market/community event in Garza García. We are so happy he decided to take the leap and open Yokot’an! He just celebrated his 8th Anniversary and I could not be happier for him. He deserves all the success for all the love and hard work he’s put into his restaurant.

As I mentioned before, Pepe and I only knew each other via Instagram. Over the years we had exchanged conversations, and even after eating at his restaurant a few times I had never been able to meet him in person. This time around, I made sure to connect and made a point of visiting when he was going to be there. Pepe is such a kind and talented person and he makes the most gorgeous and delicious food!

We started chatting as if we had known each other forever and when he suggested a collaboration, I did not hesitate. Pepe gave me his famous Tamal recipe and I am so excited to share it with you! I present to you his tamal on a plate that was gifted to me by Pepe. This has been so much fun! Thank you for sharing Chef!

A few notes on this recipe. I have made adaptations because I cannot find fresh nixtamalized masa in Ottawa, so I am using Maseca. If you can find Maseca for Tamales, that is great, but I could not find it this time around. This masa for tamales is very soft, like cake batter. It is better suited to make tamales in banana leaves. The use of oil in the recipe makes it possible to make plant based tamales, if that is something that you are interested in making. I am using Cubanelle pepper as I cannot find Anaheim in Canada.

I have to say, these tamales are delicious and pretty easy to make. You can use any type of filling you want. I think this recipe would make excellent vegan tamales, so I hope you give them a try!

Tamales estilo Tabasco, from Chef Pepe Hernández
Yokot’an

3 1/2 cups Maseca
3 1/2 cups warm water
3/4 cup neutral oil (vegetable, corn, canola, grapeseed) or rendered pork lard
2 2/3 cup chicken or vegetable stock
1/3 cup minced Cubanelle or Anaheim chile
2/3 cup minced white Spanish onion
2 Tbsp kosher salt, or to taste
2 1/2 packages banana leaves, cut into 25 x 30 cm pieces and wiped clean
3 1/2 cups pulled chicken
3 cups mole sauce

To prepare banana leaves, cut them into 25 x 30 cm squares (10 x 12”) approximately, and trim the centre rib of the leaves off. That part will be discarded. Wipe the leaves very well with a damp towel and then place each cut piece over an open flame or on a hot comal to soften them, moving them constantly so they won’t burn. You will see they become pliable and shiny. Repeat until all pieces are done.

In large bowl, combine Maseca and water and knead into a smooth ball. Let rest, covered, while you prepare everything else.

When your mise en place is ready, add oil to masa and knead to combine.

Add chicken stock in 4 additions, mixing as you add liquid every time. You should have a very loose masa that resembles cake batter.

Add Cubanelle pepper, onion and salt and mix well. You are ready to make tamales.

Place one piece of banana leaf in front of you and spoon some masa in the centre (between 1/3 and 1/2 cup). Top with 2 Tbsp chicken and 2 Tbsp mole sauce. If some of your banana leaf pieces are a bit smaller, add less masa to them, to make smaller tamales.

Gather the top and bottom edges and bring them together. Make a couple of folds down (as if you were closing a paper bag) until you reach the filling, then fold the edges in towards the centre, forming a rectangle.
If you want, you can tie with a piece of banana leaf, but I find you don’t really need to tie them. Repeat until all tamales are formed.

Prepare your steamer by filling with water and lining racks with extra pieces of banana leaf.
Layer tamales on racks. I like using my Asian steamer because it has several flat racks - it works great for banana leaf tamales. If you don’t have one, any pot with a steamer rack works. Arrange tamales so that they overlap each other and try not to stack more than three levels of them. Cover tamales with more banana leaf pieces or parchment paper.

Bring water in steamer to a rolling boil, then turn down to a steady simmer and set the timer for 1 hour. If you throw in a couple of pennies to the water in the pot you will hear them rattling as the tamales cook. If the noise stops, it means your water has run out, so time to add more. The last thing you want is for your tamales to taste burnt!

At the one hour mark, take one tamal out and let it rest for 5-6 minutes. Peel the banana leaf off and if it releases from the leaf easily, then the tamal is cooked. If masa is still soft, then re-wrap and continue to cook for another 15-20 minutes and test again. Tamales will be done when they release from the leaf easily. It is very important to let them rest a few minutes before you check, as the masa will be extremely soft coming out of the pot. Once tamales are cooked, remove from steamer and let them cool off on baking sheets. Store in fridge for 5-7 days. Can be frozen.

Enjoy with your favourite salsa.

Makes about 24 tamales.

Comment

A Christmas favourite cookie: Polvorones de Nuez

December 11, 2022 Maria Garza

For me, Christmas is all about family, tradition, and lots of food memories. If you have read my past Christmas recipe blogs, you may recall me talking about the foods I ate as a child during the holidays, but most especially the sweet treats my family made.

I come from a real foodie family, with accomplished cooks and bakers everywhere! Perhaps that is why when December comes around, I start itching to make all kinds of sweet treats! I love making candy, from almond and pecan garapiñados (recipe here in the blog), pecan caramels, and caramel, pecan and chocolate turtles. Every year I try something new - this year I will try making Glorias, the sweet milk and pecan candy popular in my hometown (stay tuned for that recipe!). On the cookie department, I love making brown sugar shortbread, Argentinian alfajores and these Mexican Wedding Cookies studded with pecans.

You may wonder why there are pecans in most of my sweet treats? Well, pecans are native to my area of Mexico, and growing up, we had a huge pecan tree right in our front yard. I remember harvesting pecans every year and the nuts made their way into a lot of our recipes. But to be honest, even if I hadn’t grown up with pecans in my front yard, what’s not to like? Buttery, rich and beautifully flavoured, pecans make delicious confections any way you look at it.

So without further ado, here is my recipe for Pecan Mexican Wedding Cookies. If you want to make these nut free, simply omit the pecans. These cookies are so delicious I have to restrain myself (remember I’m not eating sugar these days?). They keep well in a tin, for 2-3 weeks. I have kept them for longer, to be honest, but they sure won’t last long because they’re so good! I hope you make some this holiday season, and enjoy with your afternoon tea or coffee.

Polvorones de Nuez
Pecan Mexican Wedding Cookies

2 cups all purpose flour
½ cup icing sugar, plus scant 1/2 cup for dusting
1 pinch salt
1 tsp vanilla extract
1 cup unsalted butter, softened slightly
1/2 cup chopped toasted pecans

Preheat oven to 350° F.

Mix flour, icing sugar and salt in mixer bowl.  Stir in the vanilla.  Add butter and mix until it comes together. Add pecans and mix until completely distributed. If you don’t have a mixer, you may do this by hand, just try to handle the dough the least possible, as the heat from your hands will warm up the butter too much, and the dough will be more difficult to handle.

Shape dough into 3/4” balls, then flatten into circles, and place on un-greased or parchment-covered cookie sheet. You can use a small ice cream scoop to make things easier. If you want a different shape, you may also shape the balls into logs, then bend to make crescents.

Chill cookies for 30 minutes. Bake for 20-25 minutes, or until slightly browned on the bottom.

Cool off completely, then roll thoroughly in icing sugar. Store in a tin.
These keep well for about 2-3 weeks.

Makes about 60 cookies.

Comment

Crispy, spicy, tangy chickpeas are an addictive and healthy snack.

December 4, 2022 Maria Garza

These crispy chickpeas are so delicious and they are inspired by a snack my aunt Celina used to make for us when we were kids. She used to present us with a bowl of cooked chickpeas doused in lime juice and sprinkled with salt and powdered chili, which us kids devoured as soon as she brought them out. I specifically remember eating these with my cousins, while bathing in the hot springs pool of her family’s country home in San Juan Cosalá, on the shores of lake Chapala. If you want to try her recipe, go ahead, it’s a deliciously simple and healthy snack.

I have started to incorporate more salads into my diet, and as a result, I am always looking for healthy and interesting toppers for them. As you know, us Mexicans love anything with lime juice, salt and chili, so that is what we’re using in this recipe. Crisping chickpeas in the air fryer is amazing because it is so quick and easy, and they are an addictive and healthy snack. You may want to make more as you’ll see they go pretty fast!

Garbanzos con Chile y Limón
Crispy, Spicy Air Fried Chickpeas

2 cups cooked chickpeas (rinsed if canned)
1-2 Tbsp Tajín seasoning
1 Tbsp olive oil
1 Tbsp lime juice
Salt to taste (only if needed)

In medium bowl combine chickpeas, Tajín, olive oil and lime juice. Toss to combine.

Preheat air fryer to 390°F. Place chickpeas in greased air fryer basket and cook for 15-20 minutes, shaking the basket once or twice during cooking time.

When chickpeas are done to your liking, remove from basket and let cool down. They will continue to crisp up as they cool.

Use them as a snack or as a salad topper.

* If you don’t have an air fryer, you can roast the chickpeas in the oven. First, make sure the chickpeas are completely dry, so use paper towels to remove every bit of moisture. Then season them and spread on a parchment-covered sheet pan and roast in a preheated 400°F oven for 25-35 minutes, tossing once or twice, until crispy.

Makes about 1 1/4 cups.

Comment

Champurrado for one, the vegan version.

November 26, 2022 Maria Garza

Mexicans have been drinking “atoles” for centuries. As you’ve heard me say many times, Corn is King, and atoles are yet another way to enjoy our most venerated food item.

Atoles are warm drinks that are enriched (and by that I mean thickened) with corn masa or cornstarch. There are myriad flavours for atoles, from strawberry and vanilla to the chocolate version that becomes a Champurrado.

Atoles are nutritious, filling and comforting drinks, and when you add chocolate, well, it just goes to the next level of goodness. Very easy to make, you can make a large batch and keep it in the fridge for a few days and warm up a mug as you please.

Champurrados are usually made with Mexican table chocolate, which has sugar. As I am cutting out most sugar from my diet, today I’m making a healthier version, using plant based milk (cashew), Maseca, unsweetened cocoa powder, just a a tiny bit of brown sugar and a pinch of cinnamon.

The next time you have a craving for hot chocolate, why don’t you make some Champurrado?  You will love it!

Champurrado para Uno
Champurrado for One

1 cup plant based milk (any kind), or your favourite milk
1 Tbsp Maseca
1/2 Tbsp unsweetened cocoa powder
Pinch brown sugar or piloncillo, or to taste
Pinch ground cinnamon

Place milk, Maseca and cocoa powder in small saucepan and whisk to mix everything together.

Turn on the heat to medium and whisk until mixture comes to a low boil.

Continue to simmer until mixture thickens somewhat, it should be a little thicker than whipping cream.

Add sugar and cinnamon and whisk briskly to make it foamy.

Serve immediately.

Makes one serving.

Comment

Baked Manzano Bananas are a really delicious treat!

November 10, 2022 Maria Garza

Have you ever had a baked banana? If you haven’t then you’re missing out! In Mexico, a very typical dessert is a baked ripe plantain, which is served with crema and queso cotija, so this recipe I’m sharing with you today is a variation of that one.

I found some gorgeous Manzano bananas at my local Caribbean grocer, so I picked them up for this recipe. The bananas must be ripe (manzano bananas need to be closer to black to be ripe), as plantains must also be for dessert.

This is one of the easiest desserts you can make, especially if you have commercial cajeta (dulce de leche). All you need to do is bake the bananas and toast some pecans (but this can be done ahead of time). If you want to make this even more special, brush the bananas with brown butter after they come out of the oven. If you prefer a less sweet version, then you can drizzle the baked bananas with crema and cotija cheese for a different but just as delicious dessert.

Please serve these bananas warm, a few minutes after they come out of the oven. If you want to make this even more decadent, add a scoop of your favourite ice cream.

Plátanos Manzanos al Horno con Cajeta y Nuez
Baked Manzano Bananas with Dulce de Leche and Pecans

4 ripe manzano bananas
2 tsp unsalted butter (or brown butter)
1/3 cup cajeta, warmed so it can be drizzled
1/3 cup chopped toasted pecans
Your favourite vanilla ice cream (optional)

Preheat oven to 400°F.

Place bananas on parchment covered sheet pan and bake for 20 minutes, or until tender when pierced with a knife. The banana skin will likely split as they bake, but that is OK.

Remove from oven and open them where skin split, then brush flesh and skin with melted butter.

Place on serving plates and drizzle with cajeta and sprinkle with pecans.

Serve immediately.

Serves 4.

** if making plantains, use very ripe (black) plantains and bake the same way, but plantains will take about 40 minutes to get nice and soft.

Comment

Turkish Red Lentil and Bulgur Köfte, plant based and delicious!

November 6, 2022 Maria Garza

There is no question that I love Turkish food, not only is it delicious, full of flavour and easy to make, but in many instances it is plant based as well. Recently, I have started to eat more vegan meals in an effort to improve my health so I am constantly on the look out for really good tasting food.

These red lentil and bulgur köfte are a prime example of a healthy, delicious plant based meal. Use fine cracked wheat for this recipe, as it hydrates quickly; Turkish red pepper paste is an important part of this recipe, look for this ingredient at a Turkish or Middle-Eastern food store. If you can’t find Aleppo pepper, use chili flakes for that bit of heat.

This mixture is typically made into torpedo shaped balls, but I have to confess that I have also skipped the shaping and used this mixture instead as a paté and simply spread it on pita or crackers.

Serve these köfte on leaf lettuce leaves, along with tomatoes, cucumbers, parsley leaves and lemon wedges. You may want to add a bit of onion as well for the best plant based wraps in town!

Mercimek Köftesi
Turkish Red Lentil and Bulgur Balls

2 cups red lentils
4 1/2 cups water
1 cup fine bulgur wheat
1/4-1/3 cup olive oil
1 large red or white onion, diced
1 Tbsp Turkish red pepper paste
1 Tbsp tomato paste
1/2 tsp hot Aleppo pepper (or red chile flakes)
1/2 tsp ground cumin
5 green onions, thinly sliced
1/4 cup chopped parsley
Juice of one lemon, or to taste
Salt and pepper to taste
1 head tender leaf lettuce, leaves separated
2 lemons, cut into wedges
Halved cherry or grape tomatoes
Lebanese cucumbers
Sliced green or red onion
Parsley leaves

In large saucepan, place red lentils and water.

Bring to a boil and then simmer, partially covered until they are fully cooked, about 15 minutes. There will be water left in the pot.

Add bulgur and mix well. Cover and let rest for 15 minutes, to let bulgur absorb the moisture. If mixture is too stiff, add a bit of water to soften it, it should have the consistency of very thick porridge. It will continue to thicken as it sits.

In the meantime, in large frying pan, heat olive oil and cook onions until softened and starting to brown. Add red pepper and tomato pastes, Aleppo pepper and cumin. Reserve.

When lentil mixture is done, add onion mixture and combine well.

Add the green onion and parsley and mix to combine. Add lemon juice and salt and pepper to taste.

Form mixture into torpedo shaped balls.

Serve in lettuce leaves, topped with tomatoes and parsley leaves along with lemon wedges.

Makes about 30 köfte.

2 Comments

A Taste of Northeastern Mexico, Carne Seca in Atropellado Norteño.

October 23, 2022 Maria Garza

I just came back from a visit to my family in my hometown of Monterrey after 3 1/2 years of pandemic-related absence. It was so good to go home, be with family and friends, visit old and new places and eat some really good food. This time around I wanted to rest and just spend quality time with my family, so I did not go out a lot, but the times we did go out were outstanding.

One of those times was a visit to El Pariente, in Allende, Nuevo León. Allende is a town that’s about 60km from Monterrey and as hard as it is to believe, I had never been. For a small town, it has a lot of great things! The town centre has a beautiful church, city hall (housing a very informative museum) and plaza; they have a winery, the impressive Rio Ramos and some very, very good food. Allende is in the citrus region, and as such, it is a major producer of oranges, it is also major producer of honey. Food in Allende is humble, traditional and delicious!

We had two amazing food experiences in Allende - the first one was eating at Las Comadres de Allende, a small and unassuming restaurant set on the edge of the Rio Ramos. This place only serves one dish, and I could almost say that has been one of the best meals of my life (but that is the subject for another post). The other was a visit to El Pariente, a huge restaurant on the highway that has been in operation since 1990. If you go on a Sunday for lunch, there is live regional music which makes for a very lively experience. Don’t expect white linens and fine cutlery here, but the food is amazing! The orange juice comes in half litres or litres, and being from Allende, it is freshly squeezed. The menu is extensive, but the meals made with Carne Seca are the specialty of the place, the town and the whole area. We had a meal called Atropellado, which is a simple preparation of carne seca (dried beef) with onions, chiles and tomatoes. It comes on a plate with refried beans and plentiful flour tortillas on the side. It is simply heavenly.

I have talked about Carne Seca before (check out my earlier post), so you know it is the iconic ingredient of Northeastern Mexico, and for good reason! It is not easy to acquire in Canada, so I figured out how to make it, and if you’re interested, it can be easily done in a dehydrator. You absolutely need dried beef for this recipe, so this may fall under a “want to do one day” for you, but nevertheless, read on because it’s so easy and delicious you may just want to try!

The most beloved breakfast in Monterrey has to be Machacado con Huevo, which is made exactly the same way as this recipe, except it has eggs. This Atropellado I would say is better for lunch, since it has no eggs. Either way, it is delicious, quick and filling. And if you want, you can add a fried egg on top as I did. Serve it with flour tortillas for the authentic experience, and don’t forget a good salsa!

Atropellado Norteño
Northern Style Fried Dried Beef

1 Tbsp vegetable oil or manteca
1/2 cup diced Spanish onion
1 Serrano chile, minced (or 1/2 Jalapeño chile)
1 cup shredded dried beef
1 large Roma tomato, diced
Flour tortillas
Salsa of your choice
Refried beans as a side

In medium frying pan, heat oil and add onion and chile. Cook until translucent and starting to get a bit of colour.

Add beef and cook until it starts to toast a bit, then add tomatoes and let cook until broken down, 3-5 minutes.

Beef should not be too wet, so if the tomato is very juicy, just let it cook a bit longer.

Serve with refried beans, flour tortillas and salsa.

Serves 2.

Comment

Eggplant is a luscious vegetable that is versatile and delicious.

September 25, 2022 Maria Garza

My love affair with eggplant came later in life. In Mexico it was not a common ingredient as I was growing up, so I didn’t start to eat it until I worked at DiVino Wine Studio. The owner was Italian, and Italians love eggplant.

Eggplant featured in quite a few of the restaurant’s dishes and I have to say eggplant and olive oil are made for each other. Then I went to Sicily and I learned how to make a true Sicilian Caponata and that is what solidified my love for this purple vegetable.

Many years later, I made it to Istanbul, and if Italians love eggplant, Turks have it in their DNA. They have so many dishes including eggplant, and so many ways to prepare it! From dips, to salads, to stews, to kebabs to the famous Imam Bayildi stuffed eggplant, this is food fit for a Sultan.

My recipe is inspired on the Turkish way of making stuffed eggplant, but instead of frying the eggplants, I prefer to roast them for a hands-off approach to tenderizing them prior to stuffing them with a meat sauce. After stuffing them, they go back into the oven to finish getting nice and tender for that succulent eggplant mouthfeel.

The sauce is simple, you can make it with beef, lamb or pork, and if you use some sort of spicy red chili in the mix it is really delicious. Turkish hot red pepper paste and tomato paste provide the savouriness and umami. If you have any leftover meat sauce, you can make a nice pasta with it.

This is a perfect end of Summer or early Fall recipe, as locally grown eggplants abound in the farmers markets. There is still time to go find some. I hope you give this a try. And get lots, you can double the recipe and freeze some for a quick dinner later on when you’re rushed.

Savoury Meat Stuffed Eggplants

6 small Italian eggplants, about 5” long
6 Tbsp extra virgin olive oil, divided
1 cup diced onion
1/2 cup diced green bell pepper
1/2 cup diced red bell pepper (or a spicy red chili)
2 garlic cloves, minced
300g ground beef or lamb
2 Tbsp tomato paste
2 Tbsp Turkish hot red pepper paste
Salt and pepper to taste
1 cup water, divided
4 Tbsp chopped parsley
Mint and parsley leaves for garnish 

Cut strips of skin off eggplants and place in a bowl with salted water and soak for 15-20 minutes. Drain and dry with paper towels.

Cut a slit down their length, without cutting all the way through, then brush generously with olive oil and season with salt and pepper.

Place on baking sheet and roast at 400°F for 35-40 minutes, or until soft.

In large saucepan, heat 2 Tbsp olive oil and cook onion and green and red peppers until soft, 5-7 minutes.

Add garlic and meat and cook, breaking up with a spoon, 5-7 minutes.

Add tomato and hot red pepper pastes, salt and pepper and mix in. Add 1/2 cup water and simmer, partially covered, for 30 minutes. Sauce should not be too runny, if it is, cook a few minutes longer. Adjust seasoning and mix in parsley. Reserve.

Slit eggplants open carefully and fill with meat mixture. Place in casserole dish and add 1/2 cup water to pan.

Bake, covered with foil, at 375° for 30-40 minutes, or until very tender.

Serve, topped with parsley and mint leaves.

Serves 5-6.

Comment

Slow Roasted Tomatoes are packed full of flavour.

September 18, 2022 Maria Garza

It is starting to get a little chilly here in Ottawa, and I have picked the last of my garden tomatoes. Sadly, the plants could have kept on going, but the weather won’t give them a chance. Of course, I can buy these kinds of tomatoes pretty much year round at my local grocer, but it is not the same as having home-grown produce.

The obvious choice for little tomatoes is to eat them raw in salads, but as the weather cools, so does my desire to eat salad. Yes, I know that is a little strange, but I’m a hot weather salad eater! Instead, I slow roast these beauties with garlic, shallots, chili and a lot of olive oil and they become soft and sweet and totally delicious.

You can make bruschettas with these, but they also make a simple pasta sauce (whole, crushed or blended), you can make a grilled cheese and tomato sandwich, or add them to a charcuterie board; I’m sure you could come up with many more uses for them!

Since I did not have any other herbs than chives, I added them at the end, but if you have fresh rosemary, oregano or thyme, you can mix them in with the tomatoes before they go in the oven. I used my blend of Urfa and Aleppo pepper from my garden, but feel free to use any other dried chili you have on hand.

This is one of the easiest recipes you can make, and the beauty of it is that roasting intensifies the tomato flavour, making for an amazing ingredient to have on hand. Roast a batch and you can have them in the fridge to use throughout the week.

End of Summer Roasted Mini Tomatoes

350g mini tomatoes (grape, cherry or cocktail)
1/4 cup extra virgin olive oil
1 medium shallot, sliced
1-2 cloves garlic, chopped
1/4 -1/2 tsp chili flakes
Salt and Pepper to taste
2 Tbsp chopped chives, basil or parsley

In medium bowl, combine tomatoes, oil, shallot, garlic, chili and salt and pepper. Toss well.

Place in baking tray and roast at 400°F for 25-40 minutes, depending on the size of your tomatoes, or until soft and starting to burst. Stir halfway through the cooking process. The shallot should also be nice and soft.

Remove from oven, let them cool slightly, then add fresh herbs.

Makes about 2 cups.

Comment

One of the best things to do with garlic is garlic confit.

September 11, 2022 Maria Garza

A few years ago I met the folks from Stonesoup Farms, a producer of award winning garlic. Ever since then, I have discovered that the freshest garlic makes a huge difference in how food tastes, and especially in the piquancy this garlic delivers.

Unfortunately for me, I lack the precise storage environment to be able to keep garlic for a long time. I was told to keep it in a cool, dark place, at around 65% humidity control. Though I would love to be able to say I can do this, I really can’t… and to be honest, I don’t even want to try! My solution is to process the garlic in different ways so it can last a while.

Since my kids moved out, I am cooking just for myself and I don’t go through ingredients as fast as I used to, so one pound of garlic is plenty for me. I keep a couple of heads to use fresh, I process a couple more and freeze (mixed in with a bit of olive oil), and the third method is to make garlic confit.

The technique of confit is to place the product in a lot of fat and cook long and slow, until the garlic starts to soften and caramelize a little bit. This makes it very sweet and takes all that bite away from it. With confit garlic, you can make the most gorgeous compound butter, mashed potatoes, pastas, soups and vinaigrettes or you can schmear it directly on a piece of crusty bread. On top of that, the garlic oil is delicious and you can use it as flavoured oil wherever you like. You will not have trouble finding uses for these two amazing ingredients.

I like to confit using grapeseed oil because this oil does not solidify when refrigerated, but you can certainly go with olive oil or any other type of vegetable oil. Trim any damaged parts of the cloves, remove the bigger woody ends and place in a small saucepan. Add enough oil to cover the cloves, then place the lid on the pan and bake. It could take anywhere from 1-2 hours to get those cloves nice and soft, so start checking at the 60 minute mark. They will be done when they are soft and golden brown. Let cool in the pan and then store in a glass jar. As long as they’re covered in oil, they will last a while, though you may find yourself using them for all sorts of things!

Garlic Confit

3 heads garlic, peeled and trimmed
1 - 1/12 cups grapeseed oil

Place garlic in small saucepan and pour in the oil. Cover the pan with its lid or tinfoil.

Place in a 250°F oven and bake until cloves are soft and golden brown. Depending on the size of the cloves, this could take anywhere from one to two hours, so start checking them at the 60 minute mark.

Let garlic and the oil cool in the pan, then transfer to a glass jar.

Keep refrigerated until ready to use.

Makes about 1 cup garlic, plus the garlic oil.

Comment

Pimientos del Padrón are a late summer treat.

September 3, 2022 Maria Garza

Have you ever tried Pimientos del Padrón? If you haven’t I urge you to find some because they are just delicious!

Hailing from Galicia, Spain, I first tried these little peppers in the old country. Let me tell you, I was intrigued and fascinated to try a different kind of pepper that you could eat just like that - we just don’t do that in Mexico, the land of soooo many chiles! There is hardly any capsaicin in these, but beware - eating them is like playing Russian roulette, as every so often you get a really spicy one!

Obviously, being in Spain, enjoying my travels, the ambiance and eating the local food makes for an unforgettable experience, but even trading my backyard for that Spanish bar is OK because these pimientos are just so delicious. Even better, they are a snap to make so you can hurry up and enjoy them with a glass of chilled rosé in the last days of late summer. You’re welcome.

Pimientos del Padrón

200g Pimientos del Padrón
2-3 Tbsp extra virgin olive oil
Sea salt to taste
Lemon wedges for serving

In medium saucepan, heat olive oil and add peppers.

Cook, stirring often, until skins are blistered and golden brown.

Sprinkle with sea salt and serve with lemon wedges.

Serves 2 as a tapa.

Comment

The easiest and most delicious Sicilian summer salad.

August 27, 2022 Maria Garza

Back in the day, when I worked at DiVino Wine Studio, I was so fortunate to be able to go spend some time in Sicily, learning to cook from industry professionals and locals alike; it was an unforgettable experience in a beautiful location!

Summer time in Sicily reminded me so much of Mexico, as it is full of cacti bearing prickly pears and tons of bougainvillea. If I closed my eyes, I could almost feel I was back home, maybe that’s one of the reasons I loved it so much there. The people, the history, the culture and the food are amazing, and well worth a trip if you can make it.

Sicily is undeniably Italian and their way to enjoy life and food are inextricably linked. La Dolce Vita is a real thing, and I experienced that while in Sicily. Long, sunny, summer days spent in the kitchen led to long and relaxed evenings around the table - great food, great wine and great company make for an amazing experience. As I reflect on those days now, I realize sometimes we need to take things slow and sit back and enjoy the simple things in life.

That little bit of wisdom can translate to this recipe: simple ingredients can make something truly outstanding, as I learned in Sicily. Just zucchini, lemon juice, mint and olive oil, some seasoning and a simple technique can make the most delicious dish. And serving it to friends and family makes it totally perfect.

This is the best time of year to make this salad, as zucchini and mint are abundant at farmers markets; choose tender, small zucchini because they will have less seeds than the big monster ones. Bring out your flakiest sea salt (I’m using a sea salt from Nova Scotia), your fruitiest extra virgin olive oil (I love Oro del Desierto, from Spain) and grab some mint from the garden and you’ll be ready to go! If you don’t have a mandoline, use a vegetable peeler to make very thin zucchini ribbons.

Make the salad and once plated, let it sit for a few minutes for the salt and lemon juice to do their job of softening the zucchini a little bit, and then enjoy!

Zucchini Carpaccio with Mint

3 zucchini, trimmed
Flaky sea salt and cracked black pepper to taste
Juice of 1 lemon
2-3 Tbsp extra virgin olive oil
Handful of mint leaves

Using a mandoline or vegetable peeler, slice zucchini lengthwise into thin ribbons.

Place ribbons on platter and sprinkle with sea salt and pepper, then drizzle with lemon juice and olive oil.

Top with mint leaves and let sit for 10 minutes.

Serves 4.

Comment

Jumping on the Air Fryer bandwagon, this salsa is so easy to make!

August 20, 2022 Maria Garza

I admit, I am as old-fashioned and traditional as they come, but recently I was asked to develop some recipes for the air fryer. I was dragging my feet, but I have to say, this little machine is great for quite a few things, and one of those is making salsa!

I love roasted salsas, and making them the traditional way on the comal or griddle takes at least 20 minutes of cooking time, depending on the vegetables you’re using. In the air fryer, that time is cut in half and your salsa will be ready much sooner! That is a great thing when we know our lives are busy, busy, busy!

This is my favourite combination of vegetables for salsa, and I have posted other recipes for this before, but take this recipe as a technique and vary your ingredients as you like. If you like a red salsa, use only red tomatoes, if you want it all green, go for only tomatillos; red or white onion, you decide; and chiles could be fresh jalapeños, habaneros, serranos or whatever you have on hand. If you prefer to use dried chiles, they won’t need much time in the air fryer, so I would toast them separately from the veggies, as you don’t want to burn them - no one likes bitter chiles! As always, season boldly, blend, and your salsa is ready!

So if you have an air fryer sitting on your counter, add salsa making to its capabilities. You won’t be disappointed!

Salsa Mixta en Air Fryer
Mixed Salsa in the Air Fryer

Vegetable spray
2 medium Roma tomatoes, whole
4-6 medium tomatillos, husked and left whole
2 Jalapeño chiles, whole
1 piece red or white onion, about 1/3 cup
1 garlic clove, whole and un-peeled
1/2-1 tsp kosher salt, or to taste

Preheat air fryer to 375°F and then spray air fryer basket with vegetable spray.

Place vegetables on basket in single layer and cook for 10-12 minutes, until vegetables are soft and slightly charred.

Remove stems from jalapeños and peel garlic, then place everything in the blender jar.

Add salt and blend, making sure you leave some texture.

Adjust seasoning and serve.

Makes about 1 1/2 cups.

Comment

Tender, savoury meatballs in a Turkish style sauce are outrageously delicious.

July 30, 2022 Maria Garza

I cannot remember hearing anyone say they don’t like meatballs. In fact, I think meatballs are some of the most comforting and beloved foods there are! Every culture has their version and I can’t think of any I dislike. I very much crave Mexican style Albóndigas Enchipotladas, and just because they’re Mexican they would be my number one choice, but these meatballs made in the Turkish style are a pretty close second.

This recipe came about in a peculiar way. I was working on a recipe for stuffed eggplants, also Turkish style, and the sauce for that recipe was so outrageously good that I had to use it for something else, so then these meatballs were born. While the eggplant recipe is not ready (I promise to post it as soon as I’m happy with it), this meatballs and sauce recipe deserves to be shared, so you can enjoy it too!

The ingredients that make this sauce Turkish are the red pepper paste, the Aleppo pepper and the method. It is common in Turkish sauces to have these ingredients and they give the sauce a particular depth of flavour that is hard to replicate without them. If these ingredients are hard to find for you, replace the red pepper paste with the same amount of tomato paste, and for the Aleppo you can use chili flakes. In the meatballs, it is important to use fresh breadcrumbs, so any bread you have on hand will work better than dried breadcrumbs.

I made these meatballs pretty small, about 1”, just because I like them that way, but if you have little time or patience, you can make them as big as you want them. Once shaped, you can freeze them raw and then next time you make some sauce they would be ready, or as I have done many times, freeze them in the sauce, then the next meal is pretty easy and quick. To make my life easier, I like to bake the meatballs first, then finish them in the sauce.

Meatballs in a Turkish Style Sauce

For the Sauce:
4 Tbsp extra virgin olive oil
1 cup diced onion
¾ cup diced green bell pepper
1 long red hot chili pepper, minced
2 garlic cloves, minced
1 1/2 Tbsp tomato paste
2 Tbsp Turkish hot red pepper paste 
1 tsp mild Aleppo pepper
2 ½ cups Marinara sauce or passata
Salt and pepper to taste
1/2 cup water
4 Tbsp chopped parsley
Parsley leaves for garnish

For the Meatballs:
3 cloves garlic
1 cup chopped onion
1 cup stale bread
1 kg ground beef or a mixture of beef and lamb
1 1/2 tsp ground cumin
2 tsp mild Aleppo pepper
1 1/2 tsp kosher salt
1 tsp ground black pepper
1/4 cup chopped parsley

To make the sauce, in large saucepan, heat 3 Tbsp olive oil and cook onion, green and hot pepper until soft, 5-7 minutes.

Add garlic, tomato paste, Turkish hot red pepper paste and Aleppo pepper and cook for 3 minutes.

Add tomato sauce and simmer, partially covered, for 30 minutes.

Season with salt and pepper to taste. Add chopped parsley.

To make the meatballs, use a food processor and turn it on. Drop in the whole garlic cloves and once they are minced, open it and add onion. Chop it finely and then add bread and chop finely.

Add ground beef, cumin, Aleppo pepper, salt and black pepper and using the pulse button, pulse only until mixture is combined, making sure it does not become too smooth.

Remove from food processor and shape into 1” meatballs.

Place meatballs on sheet pan and bake at 375°F for 12-13 minutes, then remove from the oven and add them to the sauce. Finish cooking in the sauce for 10-15 minutes.

Serve, garnished with parsley leaves.

 Makes about 70 meatballs, serves 8-10.

Comment

My version of Kisir, a delicious Turkish Bulgur Salad.

July 23, 2022 Maria Garza

If you follow my adventures, you will know that I fell in love with Turkey the moment Julia and I landed in Istanbul. The culture, the history, the climate, the architecture, the people and of course the food are out of this world!

While I cannot in any way say I’m an expert in Turkish cuisine, I can say I am an enthusiastic student. I have been cooking for a long time to understand flavour profiles and then be able to make my own versions of dishes. This is the case for this delicious bulgur salad.

What I love about this salad is that it is so easy to make and it is as flavourful as they come. I love using new ingredients and one of them here is the red pepper paste (I prefer the spicy one), as well as pomegranate molasses.

This salad could be related to Lebanese Tabouleh, but in the case of Kisir, the cracked wheat is the main ingredient, rather than a supporting actor. As we are using fine cracked bulgur, the only thing we need to do is soak it in hot water for a few minutes and the rest is just adding all the ingredients. Granted, there is a fair bit of chopping to do, but it is well worth it for the results.

There are many ways to make this salad; some people sauté onion and then add them to the bulgur, some people omit the red pepper paste and use tomato paste instead, and instead of pomegranate molasses they use lemon juice. These are all fine substitutes, but I like a lot of flavour and a moderate amount of heat, so I use the spicy red pepper paste as well as tomato paste and I love the sour note of the pomegranate molasses. As for vegetables, I like tomatoes, green onions, cucumber and a good amount of chopped parsley and mint. Balance things off with lemon juice, salt, pepper and olive oil and you have one of the easiest and tastiest salads.

A note on substitutions: if you cannot find the hot red pepper paste, use tomato paste and add some chili flakes for heat; if you cannot find fine bulgur, use regular couscous; and if you cannot find pomegranate molasses, use lemon juice instead.

Kisir makes a great addition to a meze menu, it also makes a great side, served as is or on lettuce leaves. Even better, this salad improves if you make it ahead, so you can make it part of your weekly lunch repertoire.

KISIR
Turkish Bulgur Salad

3/4 cup fine bulgur (cracked wheat)
3/4 cup boiling water
1 Tbsp Turkish hot red pepper paste
3/4 Tbsp tomato paste
3/4 cup finely chopped green onion
1 large Roma tomato, diced
1 cup diced cucumber
1/2 cup chopped parsley
1/4 cup torn mint leaves
Juice of 1/2 lemon, or more to taste
1 Tbsp pomegranate molasses
2 Tbsp extra virgin olive oil
Salt and cracked pepper to taste

In large bowl, place bulgur and add boiling water. Stir it in and let it soften for 10-15 minutes, then fluff with a fork and let cool.

Once bulgur is cool, add hot pepper and tomato pastes, mix in until they are well distributed and then add green onions, tomato, cucumber, parsley mint, lemon juice, pomegranate molasses, olive oil and salt and pepper to taste.

Mix everything very well and serve.

Serves 4-6.

Comment

Salsa Tatemada, a mixed lightly charred salsa.

July 16, 2022 Maria Garza

There are thousands of ways to make salsa, and when I say that, I’m not joking. Every single time I make salsa is a bit different than the one before, even if I’m trying to make the same kind. When you vary the main vegetables, the chiles, the alliums and seasonings, the variations of the final dish are endless. And personally, I think that is tons of fun!

I love the combination of tomatoes and tomatillos, and when I make a salsa with both, I enjoy it the most. Possibly because that is the way my Nana made hers, so there is that nostalgic memory that draws me every time, but that does not make it any less amazing. The tomatillos add a slight tang that complements this salsa very well.

Charring the vegetables over an open flame is a great way to add another dimension of flavour. You can lightly char, as in this recipe, but you can also deeply char, and that salsa will be bolder and more assertive, lending itself very well to grilled meats.

If you have a gas stove, you can char right on the grates, but it makes a big mess. You can use a grill basket, a cooling rack or, as in my case, a flat metal steamer insert that I bought in Chinatown. It has small holes that let the flames through, but the holes are small enough that it does not leave a huge mess on my stove, and that’s why I love it the most - anything that makes my life easier will be my friend. If you don’t have a gas stove, you can char on your barbecue, or under the broiler.

The ingredients in this salsa are all fresh - Roma tomatoes, tomatillos, Jalapeños and onion. You can vary the recipe using the same technique, and use dried chiles, just make sure you toast them lightly so they don’t turn bitter. Make sure you season boldly and don’t blend too much so your salsa has some texture.

Enjoy it on everything, from your morning eggs, your tacos, burritos or tostadas. It is so good even for dipping, so you may want to double the recipe!

SALSA TATEMADA
Lightly Charred Salsa

2 medium Roma tomatoes
3 tomatillos, husked and washed
2 Jalapeño chiles
1 slice white Spanish onion, 3/8” thick
1/2 tsp sea salt or more to taste
1 tsp vegetable oil

Place tomatoes, tomatillos, Jalapeños and onion on rack over flame and char on all sides until vegetables are soft and have blackened somewhat.

Remove Jalapeños and cut stems off.

Place everything in blender jar and add salt. Blend, but make sure salsa still has some texture.

In medium saucepan, heat oil and pour in salsa. Cook over medium low heat until slightly thickened, 5-10 minutes. Adjust seasoning and serve.

Makes about 1 1/2 cups.

Comment

Pretty in Pink, is this Agua Fresca de Tuna

July 2, 2022 Maria Garza

I have to say with absolute certainty that prickly pears, or Tunas, as we call them in Mexico, are my favourite fruit in the whole wide world. Growing up in Monterrey, I looked forward to late summers, when tunas would be in season. My Nanny would go to the market and buy whole cases and as she would peel them, they would be devoured by my siblings and I.

Tunas are the fruit of the nopal cactus, and they come in red, green or golden varieties. All are delicious, but none as good as the golden ones. Unfortunately, they are never exported and even in Mexico, they are getting harder and harder to find. Still, I would never discriminate a tuna and I will eat whatever you put in front of me.

In Canada we only get red ones, and I have to say, I love the colour. Eating out of hand is my favourite, but making drinks with them is my second choice. It is so easy to make aguas frescas and this one is no exception. Just peel, chop, blend, strain, add a bit of lime juice, sugar to taste and a bit more water. That is that. Serve over ice and enjoy. Best summer drink ever!

Agua Fresca de Tuna
Prickly Pear Cooler

4 prickly pears, peeled and chopped
Juice of 1 lime
1/4 cup sugar or sweetener of choice, or to taste
4 cups water
Ice cubes

Place prickly pears in blender jar and add 2 cups water.
Blend over medium speed until fruit is broken up completely, but not so much that you break up the seeds.
Strain into a 4 cup measure and press on the seeds to strain all the juice.
Add lime juice and sugar to taste.
Stir to make sure sugar is dissolved, pour into a pitcher and add 2 more cups of water.
Serve over ice.

Makes 1 litre.

Comment

Monterrey's most iconic breakfast is Machacado con Huevo.

June 26, 2022 Maria Garza

A couple of weeks ago, I made Carne Seca, so today I’m showing you one of the most delicious and decadent breakfasts there is, made with that delicious dried beef.

Growing up in Monterrey, this was one of the most beloved (weekend) breakfast or brunch items, whether at home or in restaurants. If you speak to anyone in Mexico and they find out you’re from Monterrey, one of the first things they will mention is Machacado con Huevo, it is that famous. You can have it plain (eggs and meat), cooked in salsa or a la Mexicana, which is my favourite.

As the story goes, Mrs. Fidencia Quiroga Chavarría opened her restaurant in the town of Ciénega de Flores, about 35km north east of Monterrey in 1928. At the time, the highway from Monterrey to Laredo was being built, and the workers from the project were Doña Fidencia’s clients. La Tía Lencha, as Doña Fidencia was known, started serving a hearty dish of eggs with dried meat, and an icon was born. Carne Seca Tía Lencha was the first commercial brand of dried beef, and it remains one of the most popular.

Another important ingredient in this dish is the tortilla - since this from Nuevo León, the traditional Machacado con Huevo is served with flour tortillas, but if corn is all you have (as is my situation today), this taco does not discriminate. A bit of refried beans on the side and lots of salsa and you will experience one of the best breakfasts there is.

For this dish, we need shredded dried beef, so you can pound homemade carne seca on the mortar, to give it the traditional look. You can also shred it by hand, cut it with scissors or mince it in the food processor.

Machacado con Huevo estilo Monterrey
Dried Beef and Eggs, Monterrey Style

1 Tbsp lard or vegetable oil
1/2 cup minced dried beef
1/2 cup diced onion
2 Tbsp minced Jalapeño or Serrano chile, or more to taste
1 cup diced Roma tomato
4 eggs
Flour tortillas
Salsa
Refried Beans

In medium frying pan, heat oil and cook meat only until toasted, 1-2 minutes.

Add onion and chiles and cook until softened.

Add tomatoes and cook until they break down and become saucy.

Break the eggs into a small bowl and break apart with a fork. Beat a little bit just to mix in the yolks.

Add eggs to pan and turn heat down. Mix gently and cook just until eggs are set.

Serve with flour tortillas, salsa and refried beans.

Serves 2.

Comment

Salsa Asada de Tres Chiles, use this as a basis for a technique.

June 19, 2022 Maria Garza

I first learned how to make a salsa of this kind in Oaxaca, Mexico. I went there to learn from Chefs Iliana de la Vega who at the time had her restaurant El Naranjo (then eventually moved to Austin, Texas) and Susana Trilling from Seasons of My Heart Cooking School.

The food of Oaxaca is amongst the best in Mexico. Tradition, local ingredients, history and lots of love go into the food there. Everywhere you go, there is something delicious to try, whether it’s a giant tlayuda on the streets or the most delicious mole in one the many upscale restaurants. From food to coffee to mezcal, Oaxaca is a food heaven.

One of the best things to do in Oaxaca is to go to the markets (there are many and also in the surrounding towns), that’s where you will find everything you need to cook like a Oaxacan. The variety of dried chiles is astounding! Many of them, like chilhuacle negro and amarillo, costeño and pasilla de Oaxaca are only found there, so stock up if you’re there! Grasshoppers and other insects are also popular, moles, nuts and seeds, and of course, all the meat, fruit and vegetables are the freshest there.

I highly recommend a trip to Oaxaca, it truly is an amazing city and all the surrounding towns have their arts and crafts specialty, so it’s worth day-tripping to find some real beauties. There are also archaeological sites in the area, so there is something for everyone to see.

But going back to our recipe, this is a roasted salsa. What I like about this is you can use it as a base technique. Roasting tomatoes or tomatillos, onion, garlic and dried chiles makes an amazing salsa, but you can use this as a canvas to make your own favourite combination.

My favourite is a salsa made with tomatillos, with at least 3 kinds of dried chiles, like this one. I also make one with 4 chiles and that one is just as good. But if you only have one type of chile, that is also good. Chiles de árbol are fabulous and super spicy, I love using a smoky chipotle or fruity cascabel, and the tiny piquín chies add extra heat. Guajillos also add a beautiful colour and a sweet note. The sky is the limit in combinations here, but to achieve that depth of flavour, the trick is to use dried chiles, not fresh.

Using a molcajete makes this salsa very rustic, but if you don’t have one, a blender works fine, just make sure not to over-blend, as this salsa should have a bit of texture. Salt is very important in all salsas, but especially when using fresh tomatillos, as they’re very tart. I like to add a bit of salt at the beginning and always adjust once the salsa is blended.

Use this salsa in everything, but it is brilliant on barbecued meat, any kind of taco (especially simple bean tacos) or your breakfast eggs.

Salsa Asada de Tres Chiles
Roasted Three Chile Salsa

400g tomatillos, husked and washed
1/4 small Spanish onion, left in a chunk
2 small garlic cloves, unpeeled
1 dried chipotle or chipotle morita chile
3 small cascabel chiles
1 Tbsp dried piquín chiles
Sea salt to taste

Preheat griddle or cast iron pan over medium heat.
Place whole tomatillos, chunk of onion and garlic cloves on griddle and roast, turning as needed, until tomatillos are browned and completely soft, onion is charred and very soft, and garlic cloves are tender.
You will have to move things around the griddle as needed and remove vegetables as they are done so they don’t burn. Don’t be afraid of colour, but we want to avoid complete burnt areas.
When tomatillos, onions and garlic are done, remove from the pan. Chop onion and peel garlic.

Add chiles to pan and very quickly toast. The tiny piquín chiles will only require a few seconds, so be careful they don’t burn. The chipotle and cascabel will take a bit longer, but not more than a full minute.

In the molcajete, place 1 tsp sea salt and the onion and garlic and grind to a paste. Once that paste is smooth, add dried chiles and continue grinding until the chiles have broken down and the paste is smooth.

Start adding tomatillos a few at a time and grind until fairly smooth before adding more. Continue until all tomatillos are done.

Continue grinding salsa until you reach your desired consistency. Adjust salt to taste.

Makes about 1 1/2 cups.

Comment
← Newer Posts Older Posts →

Copyright © 2025 The Cultural Kitchen
All Rights Reserved

1936 Ranchwood Way Orleans, Ontario K1C 7K7
613.762.0940