• Welcome
  • About
  • Workshops
  • FOOD FOR BLOG
  • Contact
Menu

The Cultural Kitchen

Street Address
City, State, Zip
Phone Number
COOKING CLASSES ON DEMAND

Your Custom Text Here

The Cultural Kitchen

  • Welcome
  • About
  • Workshops
  • FOOD FOR BLOG
  • Contact
Brushes Mercado-1.jpg

FOOD FOR BLOG

Carne Seca, a specialty of northern Mexico.

June 5, 2022 Maria Garza

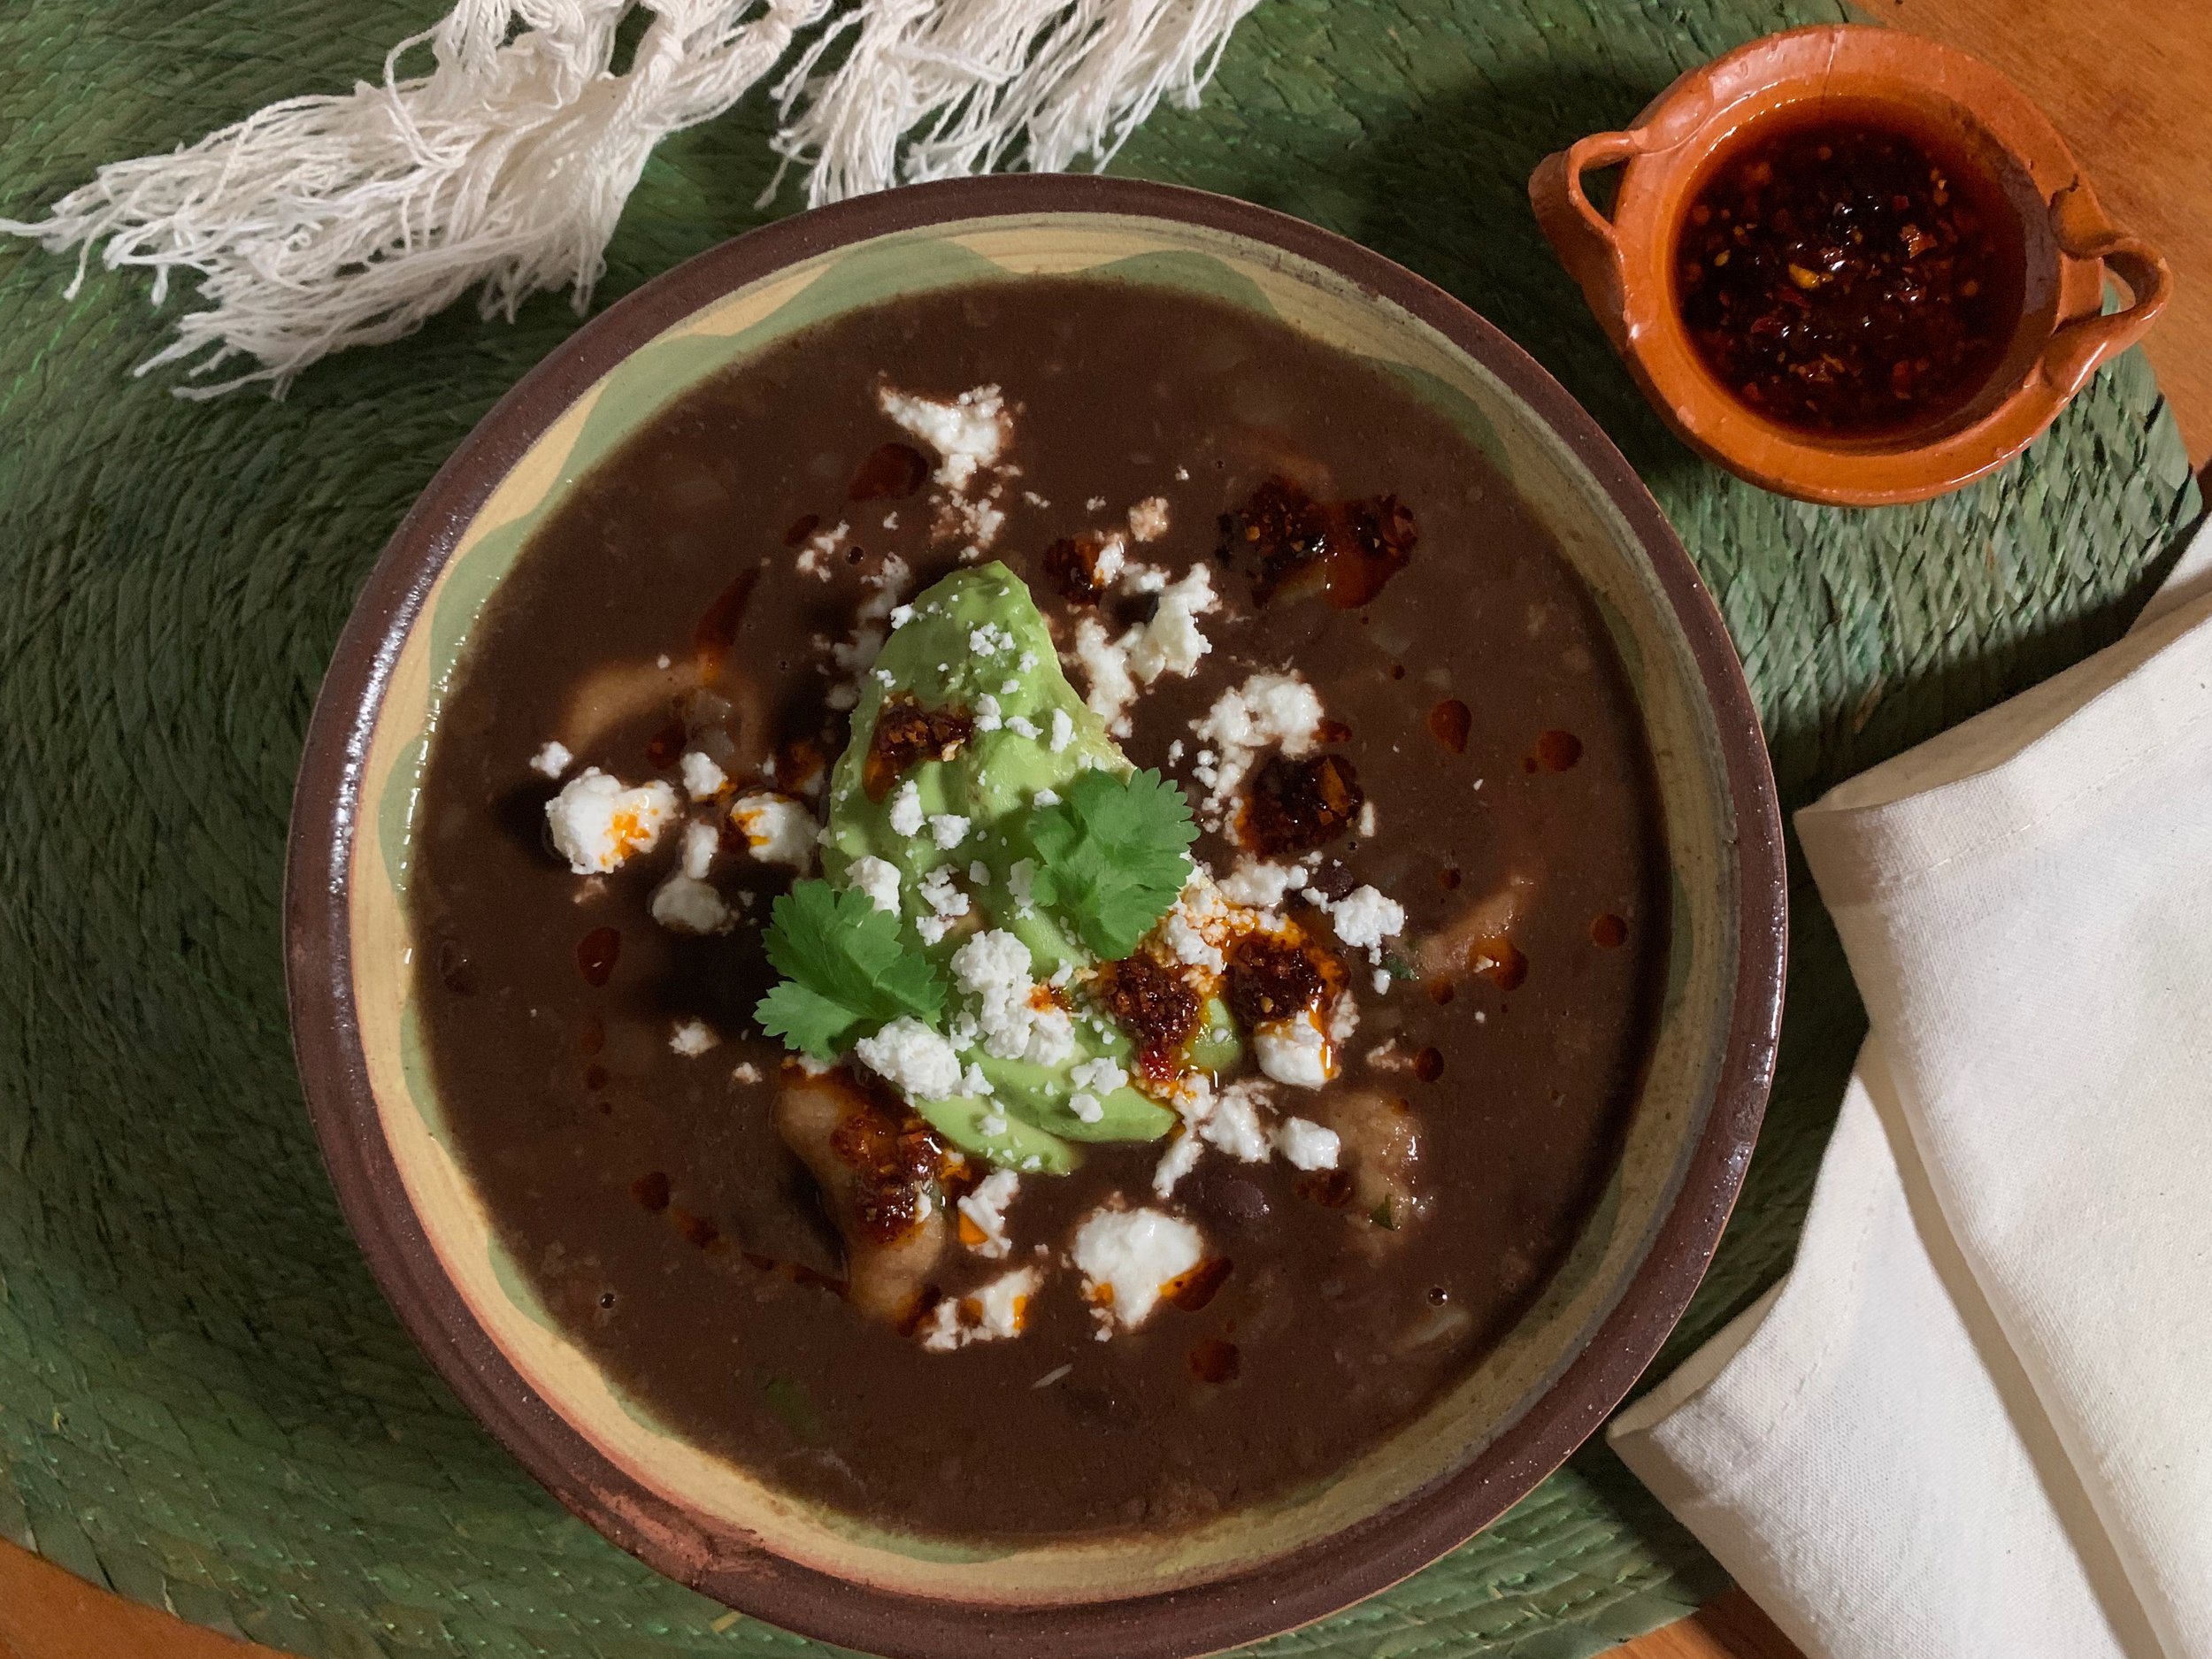
Growing up in Monterrey, one of life’s pleasures was to enjoy a Sunday breakfast of a good Machacado con Huevo, made with Carne Seca. What is that you ask? Well, let’s start with the meat.

Carne Seca is simply salted, dried beef, but there’s nothing simple about this ingredient. Monterrey and the northern states of Mexico were populated by (nomadic) hunting tribes including Chichimecas, Apaches and Tarahumaras. Meat used to be dried in the desert sun as a method of preservation and this is what today is a prized ingredient in my hometown.

Originally, this was done with venison, but eventually it changed to beef. This meat is made by salting very lean, very thin beef steaks and then drying them. Meat was hung up outside, taking advantage of the strong sun, but eventually the process became industrialized. Still, this product remains expensive, as the yield of the meat is about 1/3 of its weight after it’s dried. In years past, I tried to bring some home to Canada, but unfortunately it was confiscated at the airport, so I have never brought it back since then. And ever since then, I’ve said to myself that I needed to learn how to make it. Never mind that was about 15 years ago! Finally, when I bought a dehydrator, this became an easy experiment and I’m going to share that with you today.

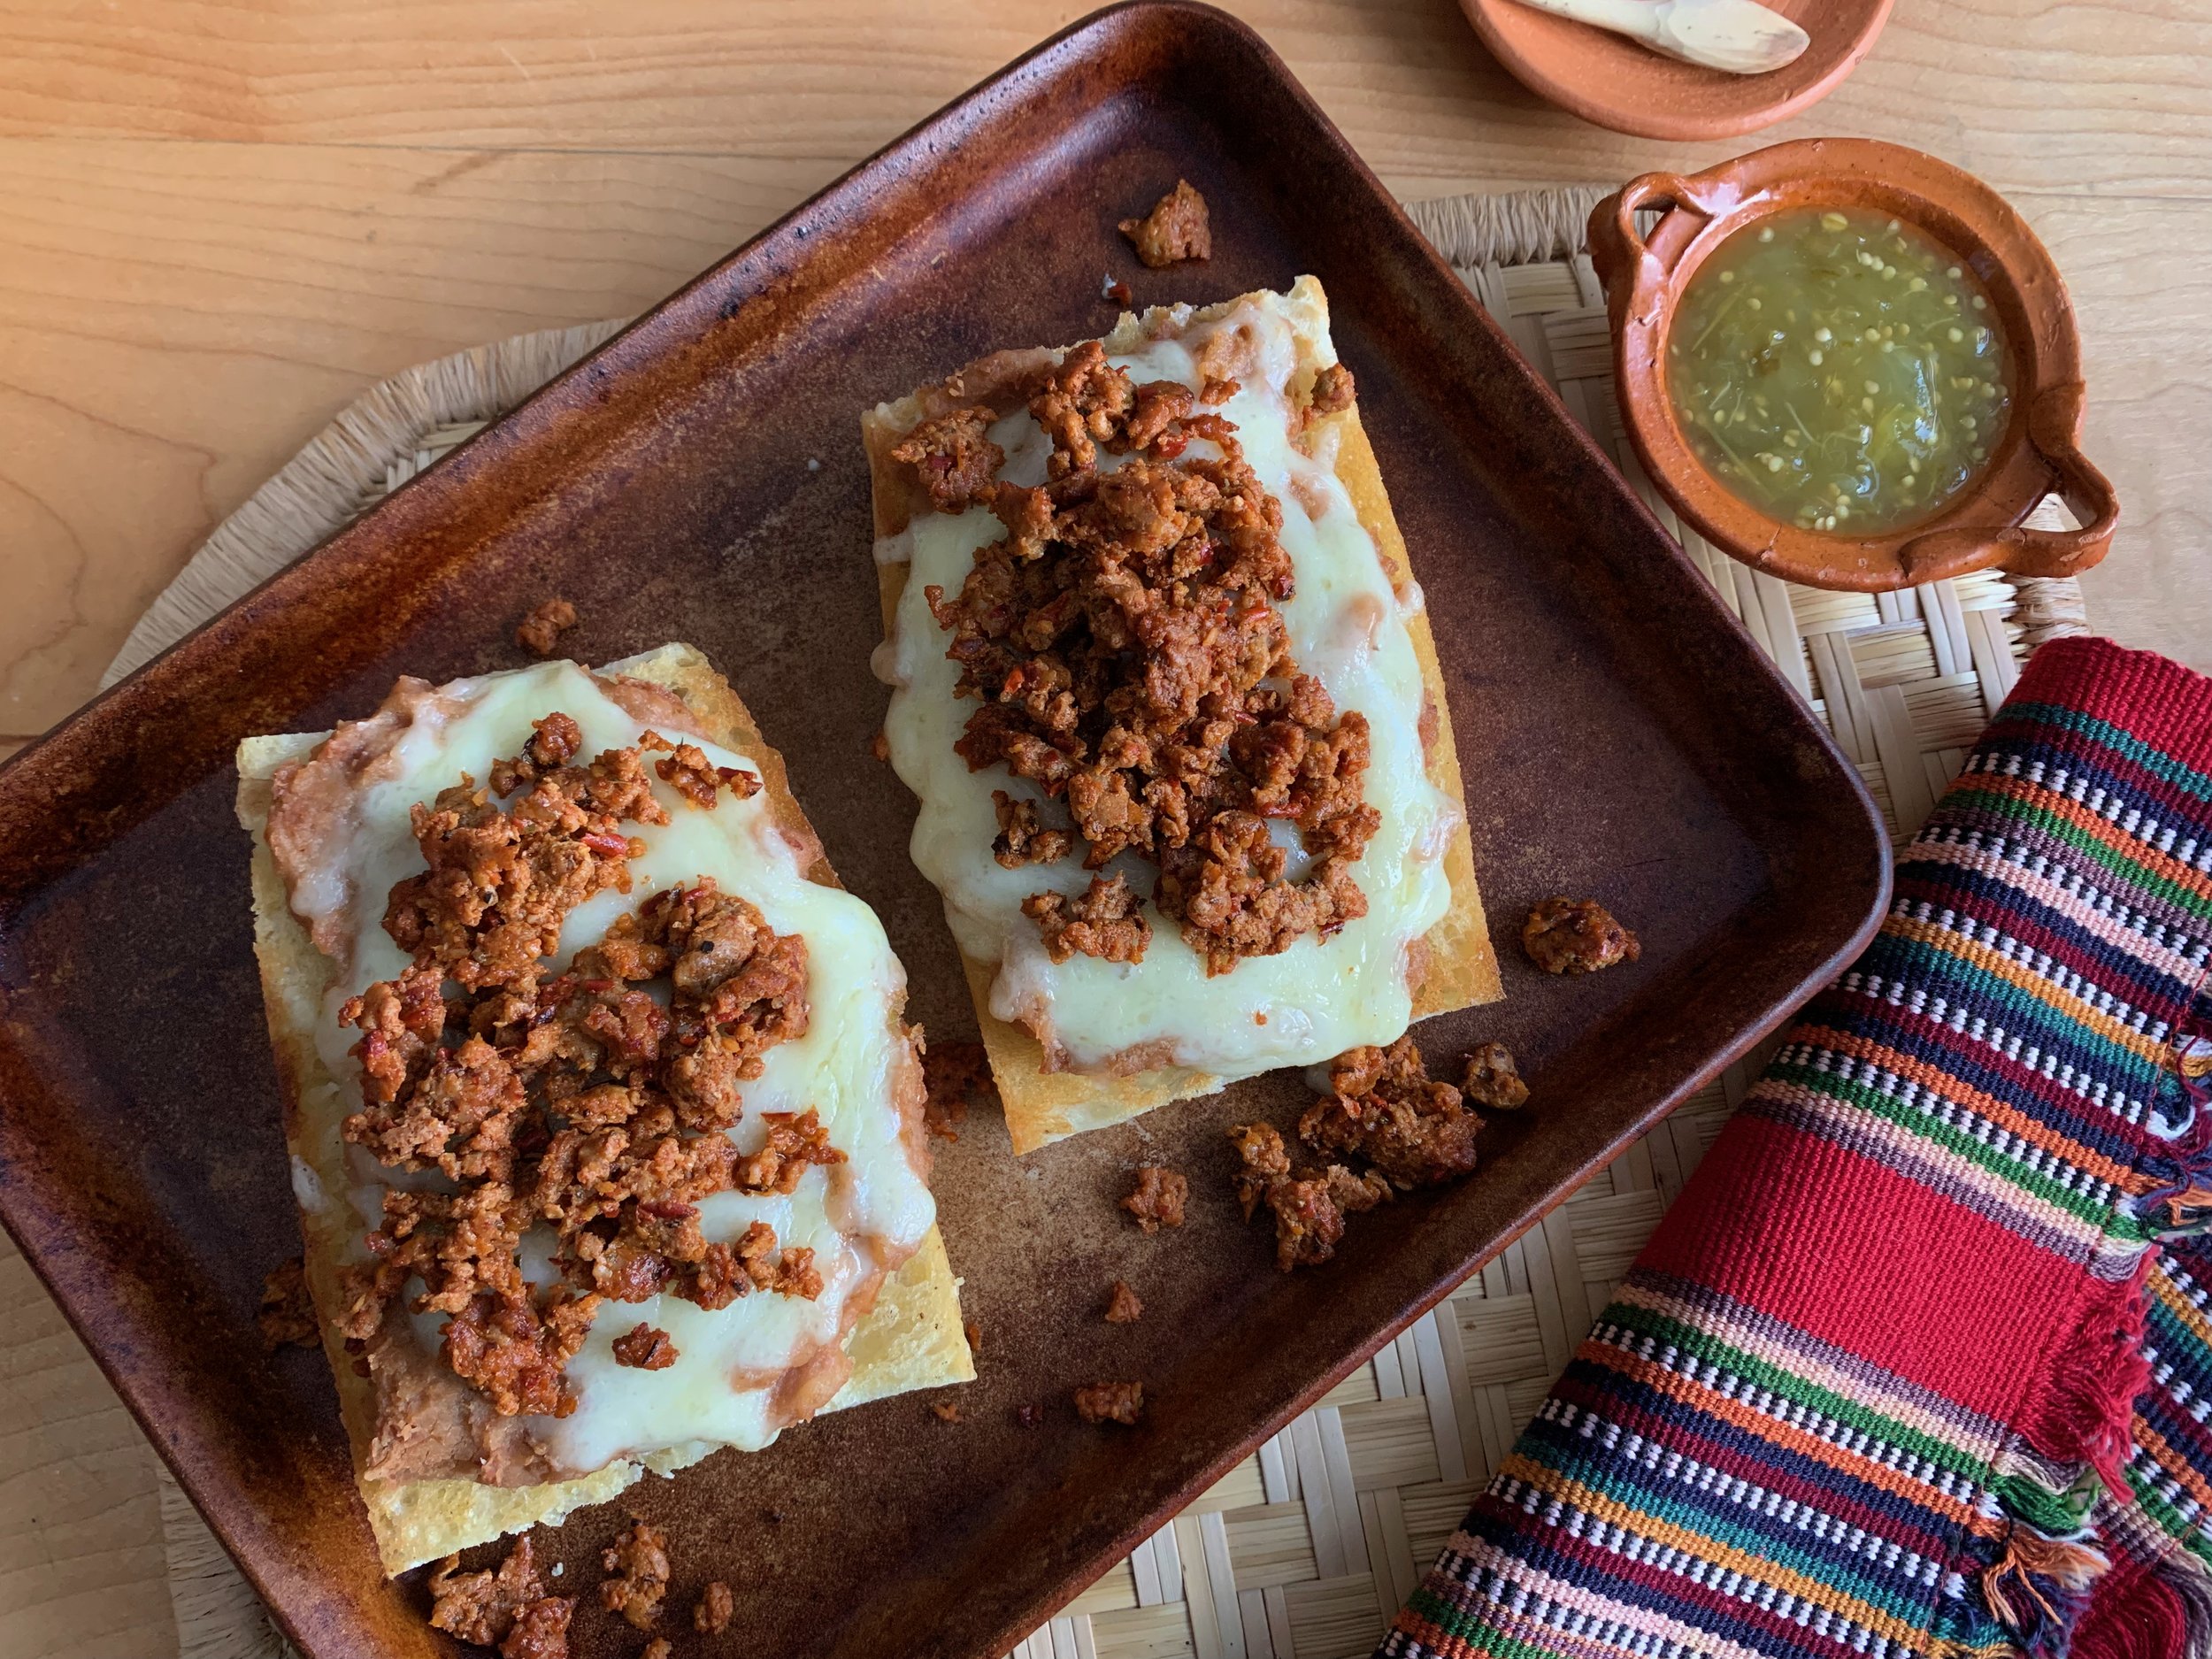
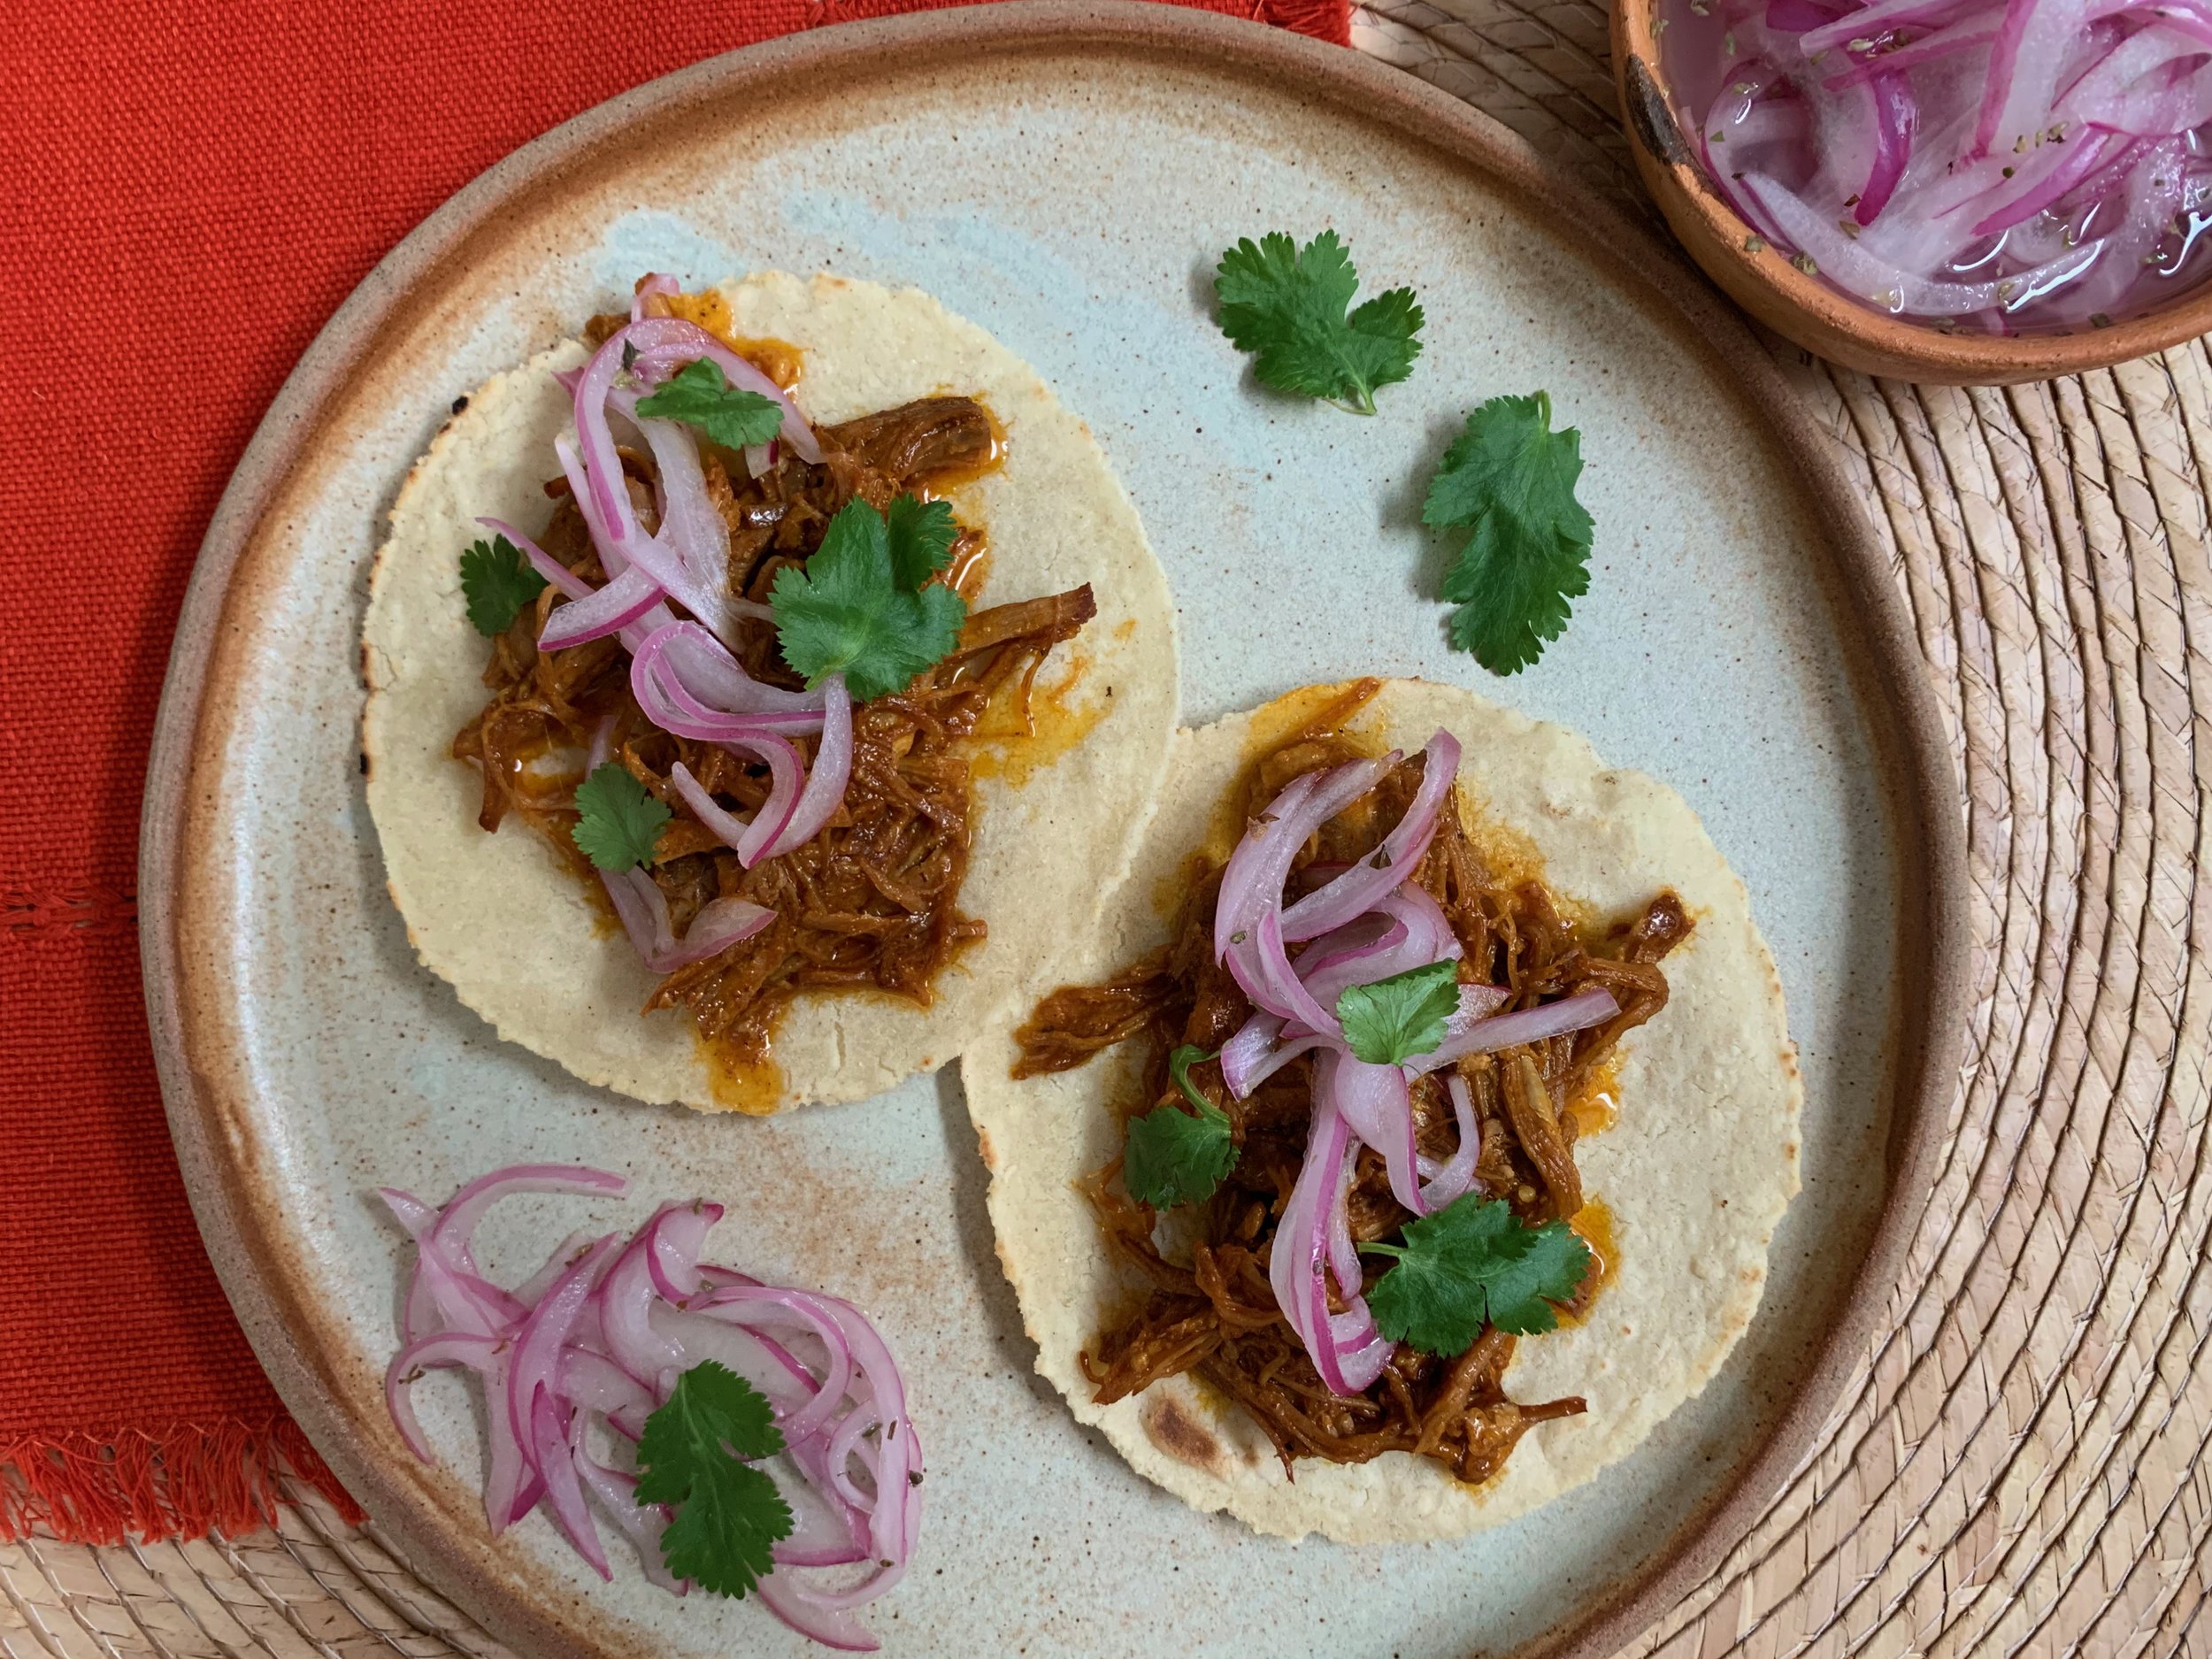
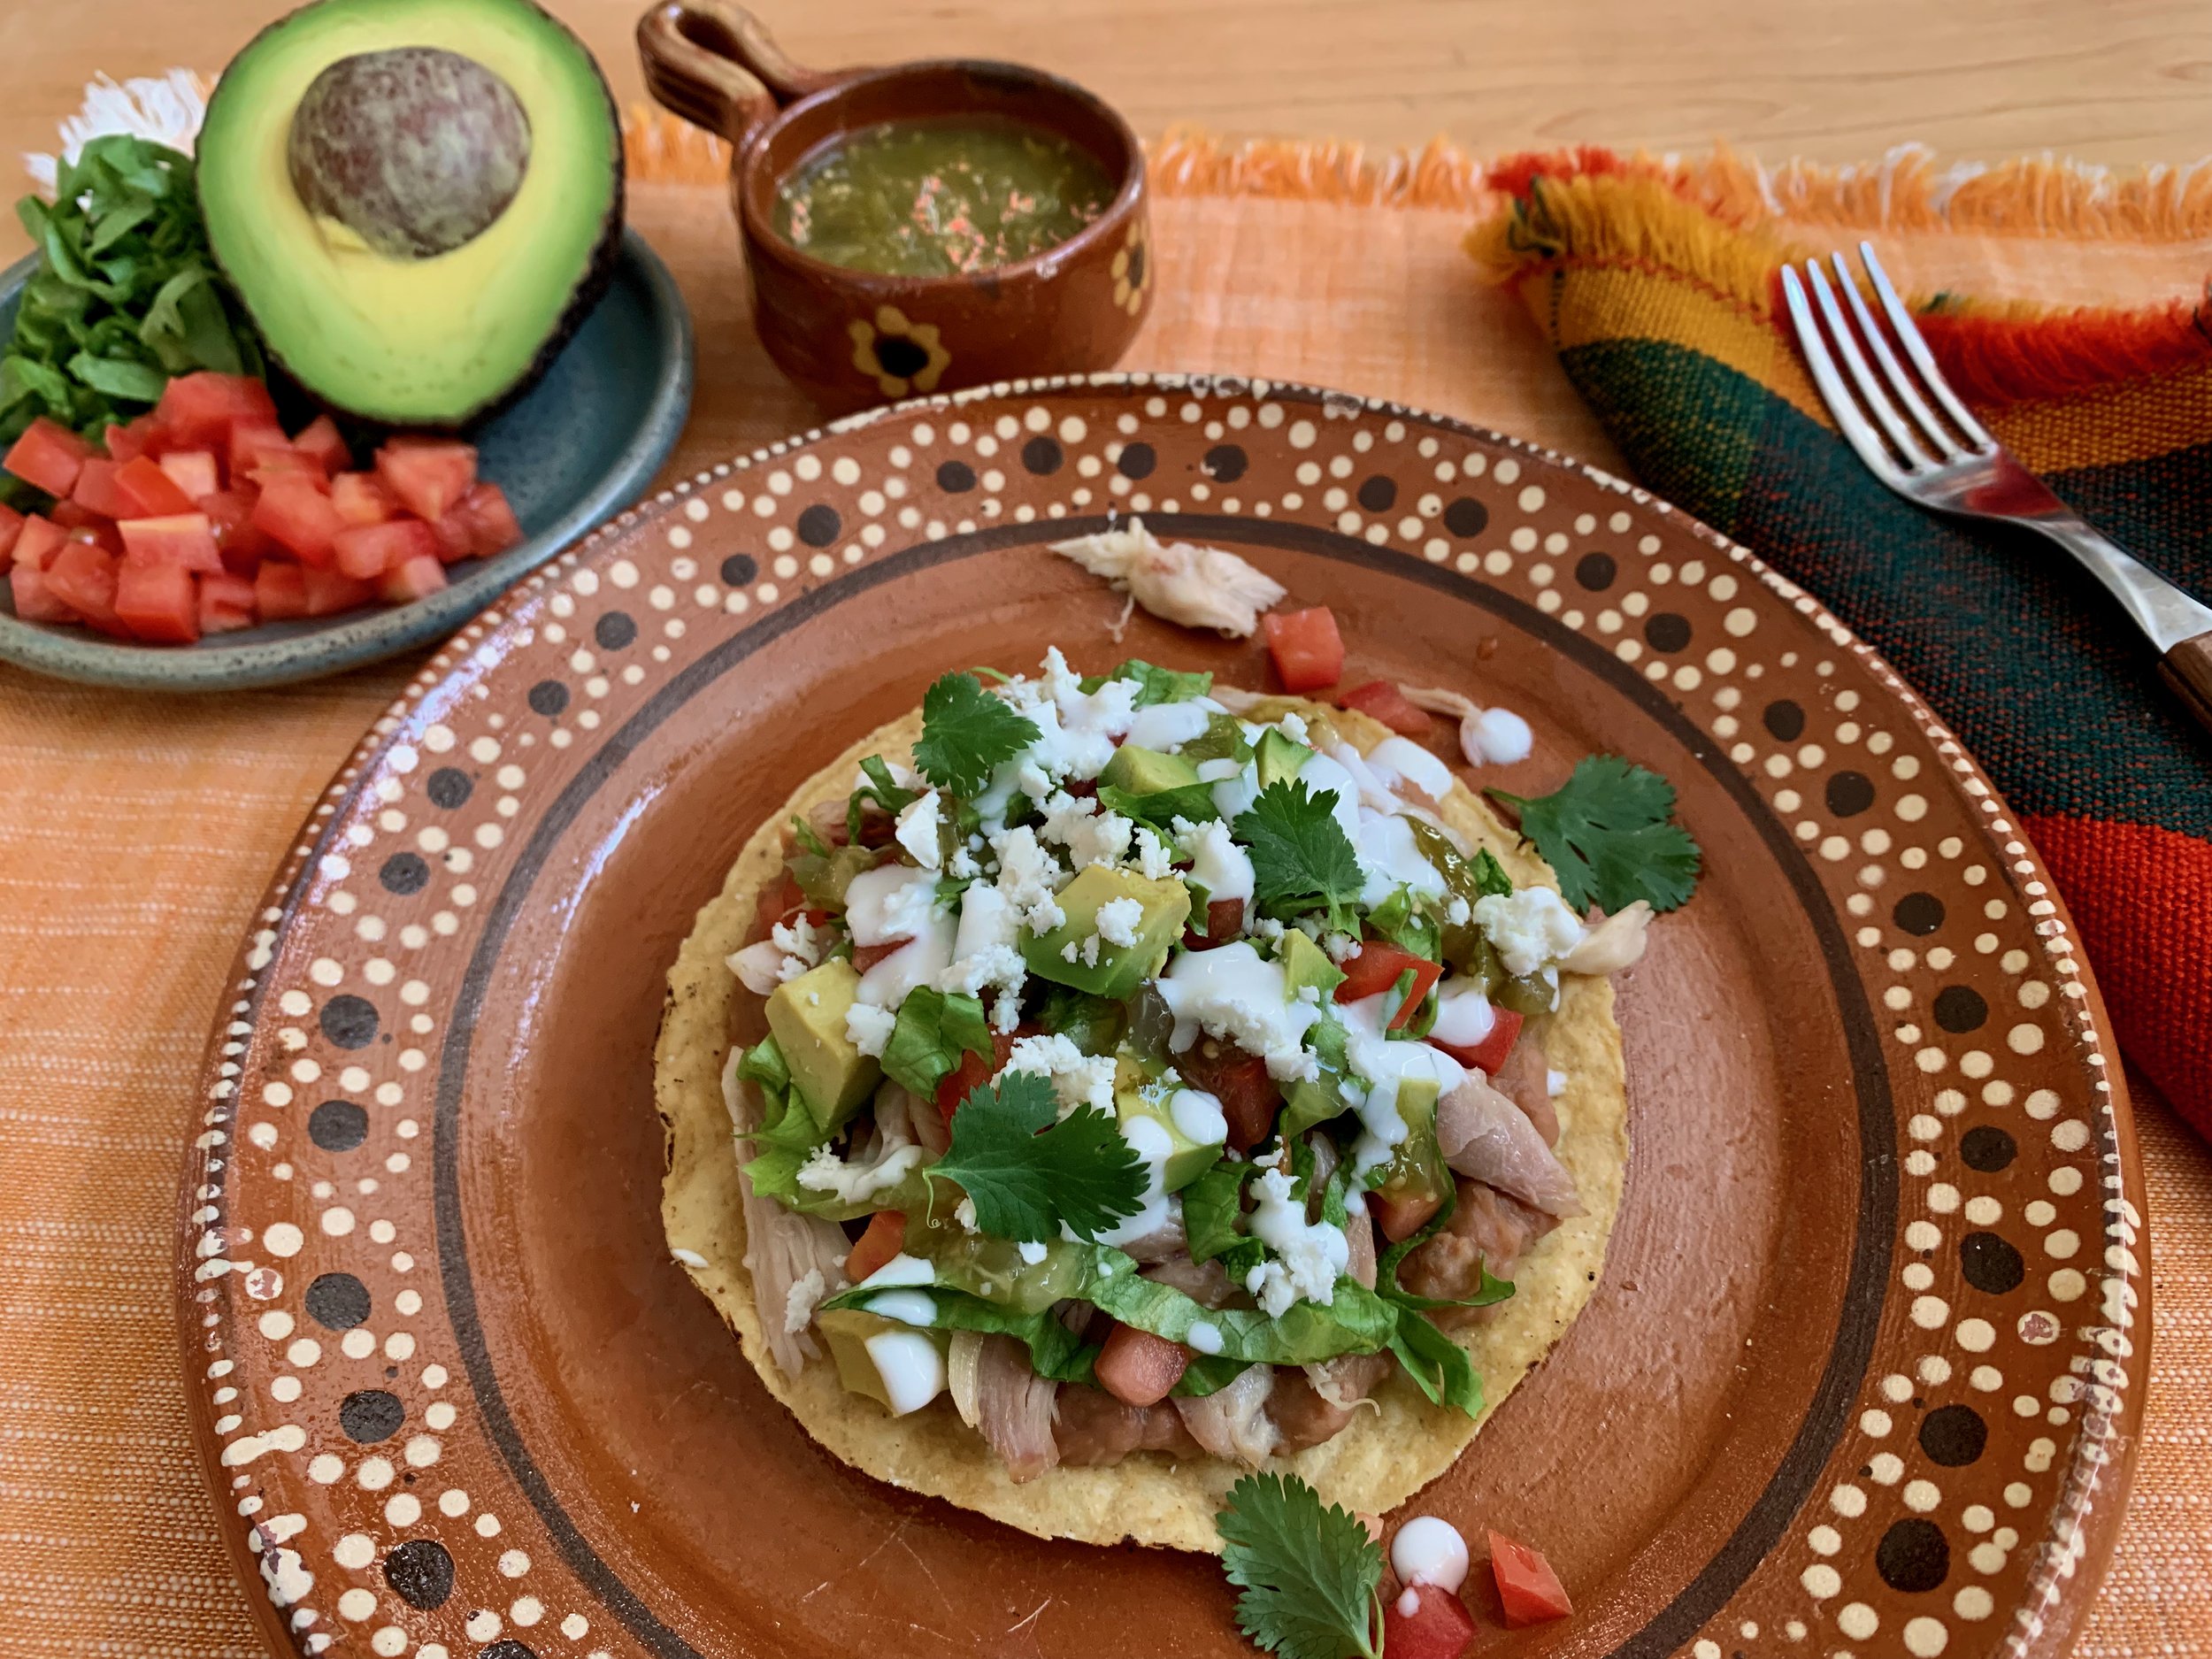
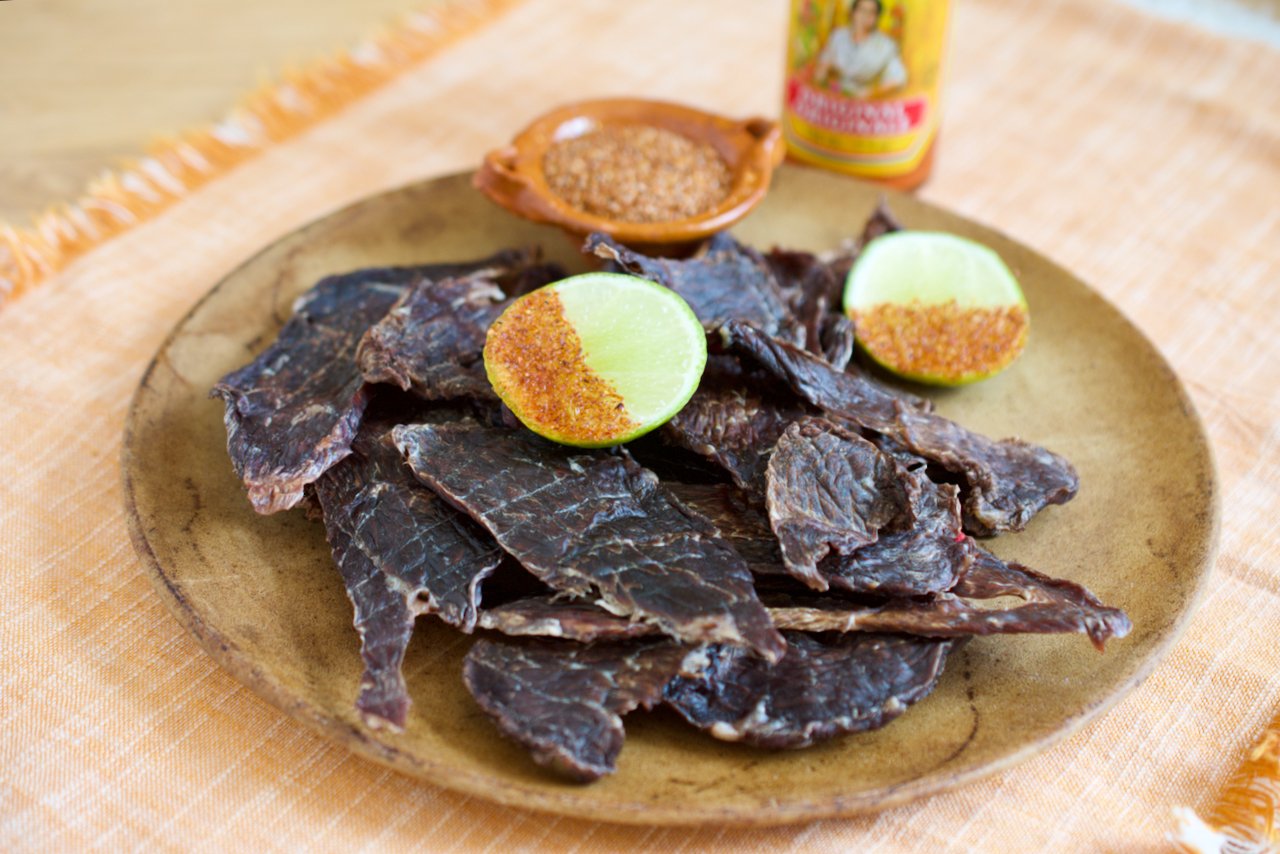
Carne Seca is a popular appetizer in Monterrey, think of it as a tapa if you will. Simply lightly toasted on a griddle, it is served with lime wedges and salsa on the side to start a meal. If you speak to anyone from Nuevo León, they will tell you one of their favourite breakfasts is a good Taco de Machacado con Huevo, made in a flour tortilla - dried beef and scrambled eggs - and for good reason! Another way to use this meat is by making a saucy concoction with potatoes, the meat and salsa, and simmered together until thick - this is called Caldillo and you eat it like a stew. Another popular dish made with dried beef is called Atropellado, and it’s simply the beef cooked with salsa, served with tortillas as an appetizer. You can make burritos, sopes, tostadas, tacos, the sky’s the limit with this ingredient! I will share recipes for these things in the coming weeks, but we need to start with the beef.

If you’ve ever made beef jerky, you know the basics of drying meat, but the most important thing is to use very lean meat; fat tends to spoil, so remove any trace of fat before you start. The best cuts for this are sirloin, strip loin or eye of round. The meat has to be cut about 1/8” or just slightly thicker - the thinner it is, the faster it will dry. The meat needs to be salted while raw - for flavour, but more importantly, to inhibit any bacterial growth as the drying process starts. After salting, the meat needs to rest for one hour in the fridge. Depending on how thick the meat is, the drying time will be anywhere from 4-10 hours. After it’s dried, the meat is best stored in the fridge, or freezer for longer storage.

Carne Seca de Res
Dried Beef

500g very lean beef - strip loin, sirloin or eye of round, cut 3 - 4mm thick (1/8” or slightly thicker)
1 Tbsp Diamond Crystal Kosher Salt or 1/2 tsp table salt

Remove all fat from meat, then season on both sides with salt.

Place meat on single layer on a rack set over a tray and refrigerate for one hour.

Arrange meat on single layer on dehydrator racks and set temperature to 160°F.

Dehydrate for 4-10 hours - this will depend completely on how thick the meat is cut, so check starting at 4 hours and go from there.

Meat is done when it is stiffer, dry and brittle.

Let cool completely and store. Meat can then be shredded using scissors or a food processor, depending on how you will be using it.

For an easy appetizer, lightly toast the meat slices on a griddle and serve with lime wedges and salsa.

Makes 175g.

Comment

This fruity mojito style sparkling water is the ultimate fair-weather drink.

May 29, 2022 Maria Garza

It is no secret that I love making drinks. Mexicans grow up drinking aguas frescas made from every kind of fruit (and a few vegetables thrown in!) or iced hibiscus or other teas, so it is no wonder that with the popularity of sparkling waters I had to come up with ways to dress up my bubblies!

Speaking of sparkling waters, I LOVE FIZZY WATER! There, I said it! As I’ve gotten older, my taste for sugar has decreased, so I have not completely abandoned my aguas frescas, but I definitely prefer them either unsweetened or considerably less sweet. So here is where sparkling water comes in - whenever I have a “sweet” drink like hibiscus tea, for example - I will top it off with sparkling water to make it less sweet, and of course, to add those wonderful bubbles. Someone offered me a sweet Sangría? Same treatment - add fizzy water; sweet lemonade? You got it, same thing.

So now that we’ve established my love for fizzy water, let me tell you about the BEST mineral water in the whole wide world! Its name is Agua Mineral Topo Chico, and it is made right in my home town of Monterrey, Mexico, with water from the springs of the Topo Chico mountain. The company has been around for over 125 years. Growing up in Monterrey I never gave it much thought, only took it for granted. Fast forward many, many years living in Canada and I finally have found it in Ottawa Latin stores! When I saw it on the shelf, I did a mental happy dance and immediately bought a few (glass) bottles. At almost $4 each they are not cheap, but for me, they are worth it for special memory-laden moments.

So, the question is how to drink this beautiful Topo Chico? Of course drinking it straight, ice cold is an amazing experience - it is so fizzy and mineral tasting that it is completely thirst quenching and I would probably do that if the weather was super hot (it’s only May, so we’re not there yet). So I decided to make a mock strawberry lime mojito and top it off with it.

This is one of my favourite ways to dress up kombucha, but it works really well for any fizzy water, whether it’s flavoured or not. You can use any berries or different soft fruit like kiwi or mango, use lime or lemon and of course the fresh mint! Muddle the fruit and herbs in the bottom of the glass and then top with the water. I prefer mine unsweetened, but if you like yours sweet, you can add simple syrup or agave. I prefer not to add any ice so I don’t water down my Topo Chico, but I leave that up to you.

I hope you try this method of sprucing up your drinks! Let the summer begin!!

Agua Mineral estilo Mojito de Fresa
Mojito-style Strawberry Mojito Fizzy Water

1/4 lime, cut into chunks
2-3 ripe strawberries, chopped
10 mint leaves
Simple syrup or agave syrup to taste (optional)
1 bottle ice cold Agua Mineral Topo Chico or any other fizzy water

Place lime chunks, strawberries and mint leaves in glass.

Using muddler or back of a wooden spoon, press on fruit until completely mushy.

If you’re using sweetener, this is the moment to stir it in.

Slowly pour in mineral water and stir gently so you don’t destroy the bubbles.

Enjoy immediately.

Serves 1.

Comment

Botanas Locas, the craziest snacks in Mexico.

May 15, 2022 Maria Garza

When you see this recipe you will think it is really out there, but trust me, it will taste like a party in your mouth!

Us Mexicans love to snack, and if the snacks include something acid, spicy and tangy, even better! It is very common to munch on fruit or vegetables doused with lime juice sprinkled with powdered chile – you can give this treatment to cucumbers, jicamas, carrots, pineapple, mangos, coconut, kiwi, oranges, grapefruits and watermelon, If you’ve ever been to Mexico, you probably have seen the local vendors pushing their fruit carts. They mound tons of fruit in glasses, drizzle with lime juice and crown them with powdered chile.

If you take this a bit further, you can drizzle a sauce called Chamoy – homemade versions are made with dried apricots, hibiscus, lime juice, powdered chile, lime and salt. This outrageous sauce is sweet, tangy, spicy and salty and just writing about it makes my mouth water. Well, we love to put chamoy on all those fruits, but also on chips and popcorn. If it’s a snack, it’s great with chamoy.

As kids, we grow up from infancy eating tangy and spicy things like tamarind, so it is not surprising that those flavours tickle our fancy as well as our taste buds! When there are get-togethers, there will always be some sort of snack featuring fruit, veggies, chips, peanuts with powdered chile, lime juice and chamoy. Creative kids and Moms have invented all kinds of “botanas locas” (crazy snacks) that are devoured as soon as they are put out.

A favourite combination is jícama, carrot and cucumber – that is what I would call a classic. Whether you make a large ring or serve them in a bowl or a glass, that is what I like to start with. From there, add whatever you like, from an assortment of different fruit to “cacahuates Japoneses” (coated peanuts), Takis, Fritos, potato chips, gummy bears, or any of the Mexican candies you find in your local Latin store. Drizzle with lime juice, powdered chile (ground chile de árbol if you like to live dangerously, or Tajín for a milder heat) and lots of Chamoy. Grab a spoon and dig in!

Botanas Locas
Crazy Snacks

1/2 small jicama, peeled and shredded
2 medium carrots, peeled and shredded
1 English cucumber, peeled, seeded and shredded
1 mango, peeled and diced (optional)
Cacahuates Japoneses and/or Hot Nuts Peanuts
Potato chips, Fritos, Doritos or Takis, crumbled
Juice of 2 limes
Powdered chile de árbol or Tajín
Chamoy
Skwinkles, gummies or any other Mexican candy

After you shred the cucumber, place it in a sieve and make sure all the liquid drains off.

In small glasses, layer equal parts of jicama, carrot and cucumber, then top with fruit (if using). Top with peanuts, crumbled chips and whatever candy you have.

Drizzle with lime juice, add some powdered chile and lots of chamoy.

Serve immediately with a spoon.

Makes 4.

Comment

Refried Beans, a must in any Mexican kitchen.

May 1, 2022 Maria Garza

One of the most common ingredients in the Mexican kitchen has to be beans. We eat beans every day, and often, more than once a day. Beans make an appearance at the breakfast, lunch or dinner table, whether as a side dish or the main event. Beans are delicious, good for you and easy on the budget. No wonder they are a staple in the Mexican diet!

I often joke and say when a Mexican girl gets married, one of the wedding gifts will always be a pressure cooker (along with a blender), so this modern girl can cook beans at the drop of a hat. No soaking required, a pressure cooker cooks beans in 40 minutes and then you can carry on with your day. Aren’t we all about convenience nowadays?

There are many varieties of beans eaten in Mexico, but the most common are pintos, bayos, Peruanos or black turtle. There are also delicious varieties only available regionally that are well worth seeking out. If you live outside Mexico like I do, you may find pintos and black beans most easily, but you can make this recipe with whatever beans you have available. The technique will be the same.

If you’re in a pinch, you can make these refried beans from canned beans, but I encourage you to make them from scratch, as you can control the amount of sodium going into the recipe, as well as stay away from preservatives (and you can make so much more for a fraction of the cost).

To cook beans, the most important thing is to have enough water, so think for one part beans, there should always be at least 3-4 parts water. I add a few cloves garlic and a chunk of onion and a tablespoon of dried epazote to the pot (if you’re lucky to have fresh epazote, throw in a few sprigs) along with just a bit of salt (I always add more salt after, so just a bit in the pot is good to start seasoning them). Close the lid of the pressure cooker, bring it up to high pressure and set the timer to 40 minutes. If you’re cooking them in the slow cooker, then cover them and cook on slow for about 8 hours, until beans are tender.

Once you have cooked beans, store them in the fridge in their broth and use for this refried beans recipe of whatever else you desire. You can also freeze them for later use. This recipe is made in the blender for very smooth beans, but if you prefer chunky beans, simply mash using a potato masher after you add them to the pan.

FRIJOLES REFRITOS
Refried Beans

4 cups cooked beans in broth
4 Tbsp manteca or vegetable oil
1 cup chopped white Spanish onion
1 Jalapeño chile, minced
2-3 Tbsp dried ground ancho or guajillo chile, or 1 dried ancho or guajillo chile, seeded, deveined, rehydrated and finely chopped (optional)
Salt to taste
Crumbled cotija or feta cheese for garnish (optional)

In blender jar, place beans and broth. You should have about 2 cups broth, and if not, add some water to make up for the difference. Blend until smooth.

In large saucepan, heat oil or lard. Cook onion and Jalapeño until soft and translucent.

Add the beans and reduce the heat to medium low. Simmer, stirring often, until beans reduce and thicken. The beans should be compact, but not dry.  If they dry out too much, add some water or broth.

Serve the beans garnished with crumbled cheese on top.

Makes about 3 cups. 

Comment

Guacamole is the king of dips and spreads.

April 24, 2022 Maria Garza

As I sat thinking of a new recipe for the blog I realized I have never shared a recipe for traditional guacamole. I almost cannot believe it! I suppose that since guacamole is one of the most requested recipes in my classes, that’s why I never thought to share it here, but that oversight will be corrected right here, right now!

The fruit that has taken the world by storm and appears in many restaurant menus in one way or another is something that us Mexicans have always taken for granted. Avocados are native to Mexico and there are many varieties, including some tiny ones that have edible skins!

Mexico is the largest producer and exporter of avocados in the world and most of the production is concentrated in the Michoacán area. Unfortunately, this area is also riddled with cartel activity that has sadly impacted the industry negatively. Regardless of all this, avocado remains a beloved ingredient in Mexican recipes, and the most famous and common dish made with avocados is Guacamole. The word itself has Aztec roots - it comes from the náhuatl words aguacatl (avocado) and molli (sauce), so in essence, the word means avocado sauce. Simple enough, right?

The traditional guacamole is an easy pairing of our most beloved ingredients: avocados, tomatoes, onions, chiles, limes and cilantro. In essence, guacamole is mashed avocado with pico de gallo mixed in. You can add other ingredients as you fancy, from pomegranate arils to pumpkin seeds. If you like garlic, go ahead and add some. You can omit the tomato or use tomatillo, you can use roasted salsa instead of the fresh veggies. There are chunky versions and there are smooth versions and some include a bit of olive oil. The mashed avocado is really a blank canvas for you to create your masterpiece.

My favourite way of making this creamy concoction is in my Mom’s molcajete, or stone mortar and pestle. I mash about 2/3 of the avocado and leave the last third in bigger chunks, then mix in the tomatoes, onion (white or red Spanish please!), Jalapeño and cilantro. Finally, a healthy dose of fresh lime juice, sea salt to taste and that is that! Guacamoles are a must in every carne asada or barbecue in Mexico, served with lots of totopos (corn chips), but also are a common spread in meat tacos or tostadas, whether steak, pork or chicken.

Lastly, a word on buying avocados. I prefer to buy them green and hard as rock. Leave them on the counter at room temperature for 2-3 days and when they turn black and yield to soft touch, then they are ready to use or store in the fridge. It takes a bit of planning ahead, but it is better than buying ripe avocados from the store, since they are fragile and oftentimes are bruised already.

I hope you make a batch of guacamole really soon. And no one will judge you if you decide to sit on the couch with a bowl of chips while you watch your favourite show!

GUACAMOLE TRADICIONAL
Traditional Guacamole

2 large ripe avocados
1 medium Roma tomato, diced
1/2 cup diced white Spanish onion
1 Jalapeño chile, minced
1/2 - 3/4 cup chopped cilantro
Lime juice to taste (I like at least 2 Tbsp)
Salt to taste
Corn chips for dipping

Core and pit avocados and place in mortar bowl. Mash, leaving some chunks for texture. If you don’t have a mortar and pestle, mash in medium bowl using a fork or potato masher.

Add diced tomato, onion, jalapeño and cilantro and mix well.

Add lime juice and salt to taste.

Serve immediately with corn chips.

Makes about 3 cups.

Comment

A refreshing ruby hued drink, Agua de Jamaica is pretty and delicious.

April 11, 2022 Maria Garza

I am sure you have heard me talk about Mexico’s Aguas Frescas. They come in a rainbow of colours and a variety of flavours, made from fruit, some vegetables or dried flowers, as is the case of Agua de Jamaica (hibiscus tea).

Jamaica, or Flor de Jamaica, as it is known in Mexico, is the dried flower of the roselle plant. It is common in many parts of Latin America and the Caribbean, though it is made slightly different in other places outside of Mexico. Agua de Jamaica is made by steeping the dried flowers in boiling water, then straining and adding more water and sugar to taste, it’s as simple as that. Though you can certainly drink this tea hot, in Mexico it is served with lots of ice for a very refreshing drink.

Agua de Jamaica is very tart, so usually it is sweetened with white or brown sugar. You could also use agave syrup, honey, monk fruit sweetener or piloncillo, whatever you prefer. After the flowers are steeped and you strain the mixture, you can use the hydrated flowers to make some unique hibiscus tacos (find that recipe here in the blog). Another clever use of this tea is concentrating it so you can make a vinaigrette - as it is so tart, it takes the place of vinegar and it makes a beautiful and delicious vinaigrette (the recipe for that is here in the blog as well). In Mexico this drink is made with only hibiscus blossoms, but I learned to add ginger from a Jamaican friend. I love the combination of hibiscus and ginger, so this is the recipe I’m sharing with you today. If you are not a fan, leave the ginger out.

Aside from being delicious, hibiscus tea is good for you! It is caffeine free, rich in antioxidants and a good source of vitamins and minerals, so go ahead and make a pitcher and enjoy!

AGUA DE JAMAICA
Hibiscus Iced Tea

2 litres water, divided
1 cup jamaica blossoms 
8 thin slices ginger (about 2-3 Tbsp)
Sugar to taste


In medium saucepan, place 1 litre water, Jamaica blossoms and sliced ginger. Bring to a boil.

Once mixture boils, cover the pan, turn the heat off and set a timer for 30 minutes.

Strain into a pitcher and add 1 litre water and sugar to taste. Chill and serve over ice.

Makes 2 litres.

Comment

Gazpacho Moreliano is THE best fruit cocktail.

April 3, 2022 Maria Garza

One of the most beautiful places to visit in central Mexico is Morelia, in the State of Michoacán. Part of UNESCO Heritage, the old colonial city was founded in 1547 with the name of Valladolid by the Viceroy of New Spain, by grant of King Phillip II. The city prospered and hundreds of new buildings were constructed. The seat of the Bishop of Michoacán was transferred from Pátzcuaro to Valladolid in 1540 and the city is home to many convents. It is said that you cannot walk one block without encountering church.

With beautiful architecture featuring the pink stone from the area quarries, the city is built in the baroque style, and it boasts over 1700 heritage buildings. In the early 1800’s the city was the hot spot for insurrection, and the movement for Independence started in Valladolid. The leaders of the movement were two priests, one of which was born and educated in the city. Valladolid was renamed Morelia in 1828 in honour of one if its sons, Jose Maria Morelos y Pavon, a hero of our Independence.

The city is beautiful, historic and culturally important. But the food in Morelia is equally impressive. As you know, Mexican Gastronomy attained the nomination for UNESCO’s Intangible Cultural Heritage of Humanity in 2010, but what you may not know is that it happened thanks to the food or Michoacán, and specifically the Purepecha people native to the State. A visit to Michoacán is worth its weight in food! The State boasts an impressive number of traditional cooks - all women - scattered around the towns near Morelia. Many of them cook out of their homes and it is possible to visit and sample their food. They have a gathering every Spring in Morelia - Encuentro de Cocineras Tradicionales (food fair) - that is well worth the trip.

Honouring family traditions and roots, the food of Michoacán stays true to its historic past. Women still grind corn on metates to make masa, and the tortillas there are some of the best I’ve ever had. Uchepos and Corundas, both types of tamales, are only made there and they are simple but complex, carrying hundreds of years of history within them. The stews, called Atakapuas, thickened with masa are unique and originally plant-based before the arrival of the Spanish. The list goes on and on. The food in Morelia is outstanding, that’s all I can say.

Walking the streets of the old city is a pleasure and one can find all kinds of treats. I was there in April and the days were hot. One of of the best things you can buy is a Gazpacho Moreliano. Not the same as the Spanish cold soup, this gazpacho is a refreshing fruit cocktail. The traditional version is made with jicama, mango and pineapple, mixed and layered with dry, salty cotija cheese and chile piquin on tall glasses. Topped up with fresh orange juice and served with a spoon. Wandering around the plaza with a gazpacho in hand is a common sight in Morelia and you will encounter Gazpacherías almost on every block.

I am giving you some guidelines to make this, as you don’t really need a recipe. Make it to your taste. Layer the fruit, cheese and chile in the glasses, then add enough orange juice to come up about 2/3 of the way. If desired or needed, you can add lime juice and salt to taste. You can add watermelon or cantaloupe to the fruit, or cucumber to your mix if you want to add a vegetable component. Some people like to add chamoy - that tangy, spicy apricot hibiscus sauce. Make your gazpacho in tiny glasses as an appetizer, or large like in Morelia, but try it and see what all the fuss is about!

GAZPACHO MORELIANO
Morelian Fruit Cocktail

2 parts diced mango (I like Ataulfos)
2 parts diced pineapple
3 parts diced jicama
Fresh orange juice
Fresh lime juice (optional)
Grated cotija cheese, or dry feta
Dry chile piquin or Tajin
Chamoy sauce (optional)

In bowl, combine mango, pineapple and jicama.
Fill glasses halfway and sprinkle with cheese and chile.
Continue to fill the glasses with fruit and top with more cheese and chile.
Pour orange juice into glasses to fill 2/3 of the way.
Squeeze lime juice if desired and sprinkle with a bit of salt and drizzle with chamoy if using.
Serve with a spoon and enjoy!

Comment

This Salsa Macha is hot, in more ways than one.

March 27, 2022 Maria Garza

Salsa Macha is hot, and I mean that literally and figuratively. Not surprisingly it was named the most valuable condiment of 2020 by the New York Times. And that is outside of Mexico. In Mexico, Salsa Macha has been popular for ages, and for good reason.

The name of this salsa refers to the fact that it is extremely spicy, so if you are brave enough to eat this super hot condiment, you are considered a Macho. Its origin is argued between Veracruz and Oaxaca, but the Olmecs were already mixing toasted dried chiles with palm oil to make a condiment that would last a long time. Veracruz and Oaxaca share a border, so we could say it could belong to both. Today, the difference in the salsas made in Veracruz to the ones made in Oaxaca is the type of chiles and other ingredients used: in Veracruz they typically use dried morita and cuaresmeño chiles, along with peanuts, whereas in Oaxaca they use chile cascabel and grasshoppers. It is very obvious to me that the Salsas Machas of today are a fusion of ingredients that came after colonization, and Veracruz was a major port where foreign ships arrived, so it is not surprising to see sesame seeds in most recipes.

The three ingredients that MUST be in a Salsa Macha are dried chiles, oil and nuts or seeds, so the beauty lies in the creation of the flavour profile for it. I like mine to be really spicy, so the bulk of my recipe is chile de árbol, but then I like to add other types of chiles to give it different notes - earthiness from the anchos, brightness from the guajillos and even more intensity from the piquines. For crunch, I love peanuts and sesame seeds equally, so one day I will use peanuts (like today) and other days I will use pumpkin seeds, but you could certainly mix them up. Sesame seeds are essential, as well as a bit of vinegar to add acidity. Another must is the garlic (are you thinking chili crisp here? there certainly is a similarity!), which gives this salsa that real crave-worthy appeal. Lastly, the Mexican oregano - though optional - it does add a herbaceous tone to the salsa, yet another dimension.

The technique is very easy, and the only real thing to keep an eye on is how fast you cook that garlic. I like to put the oil, peanuts, sesame seeds and garlic in the saucepan, then turn on the heat to medium high for a couple of minutes. When I start to see little bubbles appear on the edges of the pan, I turn the heat down to medium - medium low and keep an eye on that garlic. It will slowly start getting golden, and when you see it get golden on the edges and whitish on the centres, then turn off the heat, add the chiles and let it cool for 10 minutes. The other important thing is to dissolve the salt in the vinegar before adding it to the oil, as salt doesn't dissolve easily in oil. After the mixture is cooled completely, then it goes to the blender, but make sure you leave some chunky texture in your salsa - it should never be completely smooth.

Salsa Macha lasts forever! Well, not forever because you will want to put it in everything. It is really delicious on seafood, on all manner of tacos and antojitos, pizza or grilled meats… you can add some of the oil to your favourite noodles or pasta sauce (arrabbiata anyone?)… need I go on?

I hope you make a batch of Salsa Macha and make it part of your repertoire. It will really be a game changer!

SALSA MACHA
Spicy Chili Oil Salsa

2 cups grapeseed, vegetable or olive oil
1/3 cup (40g) raw peanuts
1 Tbsp (10g) raw sesame seeds
4 large cloves garlic, peeled and sliced thick
3/4 cup chile de árbol (20g), cut into 1” pieces
2 chile guajillo (15g), stemmed and seeded, cut into 1” pieces
2 chile ancho (20g), stemmed and seeded, cut into 1” pieces
2 Tbsp (5g) chile piquín
1 Tbsp (15g) apple cider or pineapple vinegar
1 tsp sea salt
1/2 tsp Mexican oregano (optional)

In medium saucepan, place oil, peanuts, sesame seeds and garlic. Turn on the heat to medium high and when you see small bubbles on the edges of the oil, turn heat down to medium - medium low.
Continue to cook until garlic is golden around the edges but still white in the centre.

Add the chiles and turn off the heat. Mix well so all chiles are coated. They will cook in the residual heat.

Let mixture cool 10 minutes. Meanwhile, dissolve salt in the vinegar completely. After the 10 minutes, add vinegar salt mixture and Mexican oregano to the pot and let cool completely.

Once mixture is cool, transfer to a blender. Blend slowly, making sure you leave some texture in your salsa, it should have chunks of nuts and chiles. Transfer to a glass jar.

Makes about 2 1/2 cups.

Comment

Tuna Tostadas, another great Lent meal.

March 20, 2022 Maria Garza

If you scroll through Mexican food social media accounts at this time of year, you will notice there is a lot of fish and seafood recipes, and that is because we are going through Lent. As I mentioned in my previous post, Mexicans are a very religious lot, and with the majority of the population being Catholic, it is not surprising people follow tradition.

As I’ve said before, I love traditions, and especially the ones that involve good food! If I am honest, I do not eat as much fish as I should, and though canned tuna may not be considered proper fish, I like it and I eat it in moderation.

Recipes called “a la Mexicana”, are making a reference to the colours of our flag - red, white and green, so the ingredients to use are red tomatoes, white onions and fresh green chiles. Making things in this method is a simple, yet delicious way of cooking, and this formula applies to many different ingredients, from chicken, eggs, beef, pork (or most proteins, for that matter) to vegetables like zucchini, cabbage or corn to name a few.

This is a very simple recipe, so the quality of the ingredients matters - I prefer tuna packed in olive oil - after it is well drained, it will not add moisture to the final dish, and in this recipe we are aiming for a dry-ish mixture so the tostada remains crispy. There is nothing worse than a soggy tostada, believe me!

As for the the rest of the ingredients, in Mexico we prefer using white (Spanish) onions, but you can mix red and white or even use cooking onions in this dish. In this particular recipe I prefer using Roma tomatoes, as they have less seeds than vine tomatoes (remember, we want a drier dish and a lot of seeds would add a lot of moisture), and you can use Jalapeños or Serranos (or even canned chipotles if you don’t have fresh chiles, but technically your dish would not be considered as being “a la Mexicana”). I use tomato paste from a tube - unless you’re using the whole can, the tube is way easier to portion and store, so it is definitely worth seeking out at your grocery store. Finally, lime juice and fresh cilantro will give your tuna acidity and brightness.

When you’re buying tostadas, look for sturdy ones that will hold the tuna without crumbling easily, there are a lot of brands out there so keep an eye out for thicker ones. Also, the size will determine how many people you will feed with this recipe - there are brands out there that are quite large.

And finally, the garnishes: sliced avocado, crema and cilantro leaves. Another way to use the avocado here is to make a simple guacamole and spread on the tostada first, then top with the tuna, but I leave that up to you. A drizzle of crema and a few cilantro leaves is all you need, as the spice is already built into the filling. But if you want extra heat, go ahead and add salsa on top. Serve with some lime wedges and enjoy!

Tostadas de Atún a la Mexicana
Mexican Style Tuna Tostadas

2 Tbsp vegetable oil
1 cup diced onion 
1 Jalapeño chile, minced (seeded if you want less heat)
2 cups diced Roma tomatoes 
2 Tbsp tomato paste
1 1/8 cups drained canned chunk tuna
Juice of 1/2 lime
Salt and pepper to taste
1/2 cup chopped cilantro
Corn Tostadas
2 avocados, sliced
1/2 cup crema, crème fraîche or sour cream 
Cilantro leaves for garnish

In medium frying pan heat oil over medium high heat.
Add onion and Jalapeños and cook until softened.
Add tomatoes and cook until they break down, about 5 minutes.
Stir in tomato paste and cook another two minutes.
Add tuna and lime and salt and pepper to taste.
Simmer for 5 minutes and add cilantro.
Serve on corn tostadas, topped with avocado slices.
Drizzle with crema and cilantro leaves.

Makes about 2 1/2 cups, serving 2-3.

Comment

Just in time for Lent, the classic Mexican Shrimp Cocktail.

March 6, 2022 Maria Garza

Mexico is a deeply devout Catholic country, and people take religion very seriously. Holy Week is one of the most important religious celebrations, and it all starts with Lent, 40 days before Easter. Lent begins on Ash Wednesday and ends on Palm Sunday, and during this period of fasting - nowadays specifically on Fridays - people avoid eating meat. This is the time when people also give up eating certain favourite foods, as a way of penitence or internal purification.

Now, I am not a strict practicing Catholic, but I have always enjoyed traditions, and this tradition is one I can certainly get behind. Introducing fish and seafood into our diets is good and having a reason to do it at least once a week makes it easier for meal planning. It is also a great way to expand our culinary repertoire to include other kinds of dishes we may not normally make.

Even though it’s March, the weather is still pretty awful here in Ottawa, so making this bright and sunny Coctel de Camarones makes me feel happy. This cocktail is made in the style of Acapulco, though I have added a couple ingredients that make it a little more Baja or Tabasco. Though this recipe is made with shrimp, you can certainly add octopus, oysters or scallops.

Our main ingredient and the star of this show is of course, the shrimp. I love to use wild Argentinian pink shrimp because they are meaty, sweet and they almost taste a little bit like lobster, so it is worth it to seek them out. When I talk about this recipe, people cannot believe there is ketchup in a classic Mexican shrimp cocktail, but it is an essential ingredient. It provides that “sauciness” that we want, but make sure you don’t go too far to make it too sweet, as sweetness is not something we desire here. We also add bottled hot salsa to counteract that sweetness and add more spice. Adding Clamato makes it way more interesting, and I like a dash of Worcestershire sauce to give it umami. The rest of the ingredients are like a pico de gallo: diced tomato, jalapeño or serrano chile and onion (red or white, though I prefer red). A bit of cucumber adds extra crunch and absolutely essential is the creamy and luscious avocado. Season with salt, black pepper and lots of lime juice, and finish with chopped cilantro. Serve with a spoon and totopos, tostadas or saltine crackers.

Whether you’re following the rules of Lent and need a Friday recipe, or just to brighten up your day, try this recipe out! It will transport you to a sunny Mexican beach. Add a beer and a bit of music and you will feel happy!

Coctel de Camarones a la Mexicana Clásico
Classic Mexican Shrimp Cocktail

340g raw Wild Argentinian Pink Shrimp, thawed, peeled and deveined
1 Tbsp salt
1 large Roma tomato, diced 1/4”
1/4 cup minced red onion
1 Jalapeño or Serrano chile, minced (seeded if you want less heat)
1 cup diced Lebanese or English cucumber
1/3 cup ketchup
1/4 cup Clamato juice
1 Tbsp Extra Virgin Olive Oil
Juice of 1 lime or more to taste
2 Tbsp bottled hot salsa, such as Botanera, Cholula or Valentina, or more to taste
A few dashes Worcestershire sauce
Salt and pepper to taste
1 large ripe avocado, peeled and diced
3-4 Tbsp chopped cilantro
Corn Tortilla Chips, Tostadas or Saltine Crackers

In medium saucepan, heat 2 litres water. Bring to a boil and add 1 Tbsp salt.
Add thawed shrimp and cook for 1 1/2-2 minutes. Drain and cool under cold running water, then chill completely.

In medium bowl, combine tomato, onion, chiles, cucumber, ketchup, Clamato, olive oil and lime juice.
Stir in bottled salsa and a few dashes of Worcestershire to taste. Season with salt and pepper to taste.

Add avocado, cilantro and chilled shrimp and toss very gently.

Serve with tortilla chips, tostadas or saltine crackers.

Serves 3-4 as a starter.

Comment

When it comes to flavour, Papas con Chorizo pack a punch!

February 27, 2022 Maria Garza

If you’ve never tried Papas con Chorizo, you’re in for a treat. Everyone likes potatoes, but when you sauté some onions, jalapeños and throw chorizo into the mix, you have a truly special dish.

Papas con Chorizo is a popular filling for gorditas, empanadas and tacos, and it is also used as topping for sopes, huaraches and garnachas. If there is street food, chances are one of the fillings or toppings will be this iconic dish, and for good reason!

You can have chunky papas con chorizo, or they could be completely mashed or just a little bit lumpy, depending on what you will be using them for, but they are so delicious because the fairly bland potatoes absorb the flavours of the onions, chiles and especially the chorizo. And if you cook with manteca, or rendered lard, well, you are in for a treat! All those street foods taste so good partly because the cooks don’t spare on the fat they use too cook with, and in many instances it will be the traditional and flavourful manteca. So, if you want to take this dish over the top, use manteca and don’t be stingy with it!

On the subject of chorizo, remember Mexican chorizo is in a class of its own - it is a raw pork “sausage” condimented with dried chiles, garlic, vinegar and spices. Don’t confuse it with Spanish chorizo because that would behave in a very different way (though cured chorizo used in this recipe would also taste really good!). You can find Mexican chorizo in any Latin store near you, or you can make your own, as I do in Ottawa, because for many years it was not available here so I started making it at home - and once you do, you never look back.

The potatoes used for this dish are white or yellow potatoes, but try not to use the starchy baking kind, because those will fall apart pretty easily. It is better to use a firmer potato that can keep its shape after cooking in water for 10 minutes, because after that you will cook it a second time in the pan with the onions, chiles and chorizo. If you want to add some tomato, you can add it after the chorizo is cooked and before you add the potatoes. Your dish will also be delicious.

I hope you try this recipe and find many uses for it. I am heading to the kitchen to make myself a taco of papas con chorizo and scrambled eggs!
Buen Provecho!

Papas con Chorizo
Potatoes with Chorizo

2 medium white or yellow potatoes, scrubbed and cut into 1/2” dice (about 2 1/2 cups)
2 Tbsp vegetable oil or manteca
1/2 cup white Spanish onion, cut into 1/4” dice
1 Jalapeño chile, minced
120g raw Mexican chorizo
Salt and black pepper to taste
¼ cup chopped cilantro

In medium saucepan, place potatoes and 1/2 tsp salt. Cover with water. Bring to a slow boil over medium heat and cook for 10 minutes (start counting when you first put the pan on the stove). They will almost be fully cooked at this point. Drain potatoes and reserve.

In large frying pan, heat oil and cook onion and Jalapeño until soft and translucent.  Add chorizo and break apart using the back of the spoon. Cook until chorizo is starting to get golden, 5-10 minutes.

Add drained potatoes and a bit of salt and pepper and mix really well. Cook, stirring often, until potatoes are fully cooked. If you feel your mixture is sticking to the pan, add a bit more oil.

Adjust seasoning and when potatoes are soft, add chopped cilantro.

Serve immediately.

Serves 4.

Comment

Enchiladas Potosinas, so simple but so delicious!

February 20, 2022 Maria Garza

I first tried Enchiladas Potosinas at my cousin Geraldina’s home in San Luis Potosí in central Mexico. Nowadays, they are a staple in the San Luis kitchens, often served for simple, easy dinners. You can buy them at grocery stores, to be brought home and simply griddle-fried and served for a very quick and satisfying meal.

But it was not always so… Enchiladas Potosinas came about - as the story goes - as a happy accident. It was in the early 1900’s when Doña Cristina Jalomo, from a small town called Soledad on the outskirts of San Luis, went to the local mill to grind corn for masa for making tortillas. When the miller handed her the masa she noticed it was tinged red and when she asked why, she was told they had ground dried cascabel chiles beforehand, and that’s why her masa turned red. Doña Cristina was not too impressed, but she was not about to waste, and she used that red tinged masa to make tortillas for her family. When they tasted these red tortillas, they all agreed they were delicious, so from then on she requested her masa be ground with chiles.

She went on to create her signature enchiladas with that red masa, for sale in a stall in the town plaza on Sundays and holidays. Doña Cristina and her Enchiladas became famous, so much so that her dish is now one of the most iconic dishes of the State of San Luis Potosí - her daughters registered the dish in 1965 and it is now an icon. What Doña Cristina created continues to be a family business, with her grandson carrying on her legacy to this day.

The name Enchilada refers to the fact that the masa has chiles in it. These are a bit different to the other types of enchiladas that are typically covered in sauce. In this case, the chiles are IN the masa, and it flavours it in a subtle and delicious way.

To make this masa, we have to rehydrate guajillo or cascabel chiles, then blend them and add that chile paste to the masa. After that, we can make these enchiladas, or use the masa to make “red tortillas”, or “tortillas enchiladas” that can be used to make other types of enchiladas or simply used as they are. The masa itself is a dream to work with and it makes very pretty and colourful tortillas. But the focus of or story today is Doña Cristina’s enchiladas, so let’s get back to the story.

Doña Cristina decided to make a type of quesadilla, but the filling is a delicious salsa and cheese combo. It’s like these enchiladas are flavoured from the inside out! A thick salsa is mixed in with crumbled cotija cheese, then it’s added to the tortilla as it bakes on the griddle. As the tortilla cooks on the griddle, while it’s still raw, you mound some filling on it, fold it over and press the edges to seal. Since the tortilla is still uncooked, the edges seal very nicely with the help of a spatula. Then you continue to cook it and that is that. You can make a lot and reserve, or you can freeze them and have them handy for a dinner emergency.

A few things you can make ahead: you can make the masa a day ahead and keep refrigerated until ready to use. You will have to knead it again until soft and pliable before using. You can make the salsa 2-3 days ahead and keep refrigerated until ready to use, or you can use any other salsa, as long as it is not runny.

To finish, the quesadillas are pan-fried and simply served with a drizzle of crema and a bit of additional cheese as a garnish. Usual sides are avocado and beans. So simple but so delicious! I hope you give this a try!

ENCHILADAS POTOSINAS
Cheese and Salsa Filled Enchiladas from San Luis Potosí

For the Masa Enchilada:
2 cups Maseca corn flour
1 1/2 cups warm water
1 tsp kosher salt
4 dried guajillo chiles, stemmed and seeded
1 small garlic clove, peeled

For the Salsa:
3 Roma tomatoes
1-2 Jalapeño or Serrano chiles
1 garlic clove
1 wedge onion (about 1/3 cup)
1 tsp oil

For the Enchiladas:
650g Masa Enchilada
150g Cotija or dry (and not too salty) Feta cheese, crumbled (or a mixture of cotija and queso fresco)
1 cup Salsa

To serve:
1 cup crema, crème fraîche or sour cream thinned with a bit of milk
1/2 cup crumbled cotija, feta or queso fresco
Cilantro leaves for garnish
Refried Beans and Avocado slices

To make the masa, place Maseca in large bowl and add warm water as you mix to make a fairly dry dough.
In the meantime, in medium saucepan, bring 4 cups water to a boil. Add cleaned guajillo chiles and simmer for 15 minutes, until completely soft and pliable.
Remove chiles from water and place in blender with 1/4 cup of the cooking water. Blend until completely smooth and then strain through a fine sieve to obtain a smooth puree. You should have about 1/2 cup.
Add chile puree to masa and wearing gloves, work it in. You may have to add up to 1/4 cup additional water, 1 tablespoon at a time, until you have a soft and smooth dough. Cover and let rest while you make the salsa and filling.

To make the salsa, in a medium saucepan, place tomatoes, chiles, garlic and onion and cover with water. Bring to a boil and then simmer for 5 minutes, just until vegetables are soft. Remove from water and blend. I like the mixture a bit chunky.
Discard water and in the same saucepan, heat 1 tsp oil. Add salsa and cook at medium low heat until salsa thickens. There should be no moisture left. This could take 15-20 minutes. Cool completely.

To make the Enchiladas:
Preheat comal or cast iron griddle over medium heat.
Make small balls of masa, about 30g each, and keep covered in bowl as you work.
Press dough balls on tortilla press between two sheets of plastic, as if you’re making tortillas. Working with one at a time, place pressed masa on griddle and wait for 1 minute. Place about 1 heaping Tbsp filling on one half of the tortilla, leaving 1” edge. As soon as the tortilla releases from the comal, use your spatula to fold the tortilla over the filling and immediately press on the edges with the spatula, to make sure it’s completely sealed. It is very important to do this while the dough is still raw, or else it won’t seal.
Continue to cook, flipping every minute or so, until tortillas are cooked, about 4-5 minutes per side. Remove to a tea towel lined rack. Continue making enchiladas until you have used up all the filling.
* You will have a bit of masa leftover, so you can make a few tortillas for snacks later.

To serve, in griddle or large cast iron frying pan, heat 2-3 Tbsp oil. When it’s hot, fry enchiladas until golden and crispy. Drain on paper towels.
Serve immediately, garnished with crema, crumbled cheese and cilantro leaves.

Makes 12-14 enchiladas.


Comment

Molletes are a favourite meal, any time of day.

February 13, 2022 Maria Garza

Molletes, the Mexican kind, are one of the simplest things you can make, but they are absolutely delicious. Growing up, we had them pretty regularly, the same way as many of you probably had grilled cheese sandwiches as part of your weekly quick meals. We come back to the fact that we use our most common ingredients - in this case beans - in every way possible, whether in a tortilla or bread, as in the case of Molletes.

In one of my trips back home to Monterrey, my sister took me to a really great place, located across from one of the city’s most famous but now defunct factories - Fundidora de Fierro y Acero de Monterrey. This was a foundry that started operations in 1900 and employed hundreds of workers. This factory had the very first blast furnace in Latin America and for years produced hundreds of tons of steel, railway parts and steel columns among other things. Since this factory had hundreds of workers, restaurants popped up around it and one of those was Restaurant Rubio, fondly called “El Rubio”.

When we walked in, it was like stepping back in time. The place has not changed at all, and by that I mean that it looks and feels like we’re back in 1949, when it opened its doors. The food at El Rubio is old fashioned and simple, but that does not mean it’s not delicious! They are famous for their Liver and Onions, their Pan Dulce baked in house and their Molletes, which is what we were after. Traditional molletes are made using a type of bread called “bolillo”, a small bun with a semi-hard crust and soft crumb. It is what we make Tortas with and it is one of the most common breads in Mexico. At El Rubio, they slather the bread with butter, grill it, then spread with well seasoned pinto beans, then top with tons of melting cheese and broil. You can order them with or without a crown of chorizo and let me tell you, they are absolutely delicious. Very well worth the trip.

At home, we simply made molletes by spreading bread with the beans, topping with cheese and baking until cheese is bubbly, but I have to say, if you have 5 more minutes to spare, it is very well worth adding the grilling part first. The end result will be even more delicious!

Now, not everyone has access to bolillos, so use whatever bread you have on hand. I’m using baguette here, but Portuguese buns are delicious, if you can find them. Pinto beans, refried, are traditional, but these are equally delicious with refried black beans. For the cheese, in Mexico we would use Asadero, Chihuahua or Menonita, but elsewhere, use whatever white melting cheese you have available. I love using Havarti or Monterey Jack, which are similar to Mennonite. Cooked chorizo can be mixed in with the beans or used as a topping, and it is optional if you don’t eat pork (but it is really good!!). Last but not least, you need a good salsa to eat these with - typically they are served with Pico de Gallo, but top it with your favourite one and get ready to enjoy an iconic Mexican meal.

MOLLETES ESPECIALES
Baked bread with beans and cheese

1 tsp vegetable oil
1/2 cup chopped onion
1/2 cup raw Mexican chorizo
2 Bolillos, baguette or bread of your choice
2 Tbsp softened butter
1 1/2 cups refried pinto or black beans 
2 cups Havarti, Monterey Jack or Brick cheese, grated
Salsa of your choice

In medium frying pan heat oil and cook onion until translucent. Add chorizo and cook, breaking it up, for about 5-7 minutes or until pork is cooked through and it starts to get crispy. Reserve.

Split bolillos in half horizontally and spread butter on them. Heat frying pan or griddle over medium heat and place buns buttered side down. Cook until golden, 2-3 minutes.

Spread beans over grilled bread.  Sprinkle cheese on top.  Place on baking tray and bake in at 350°F until cheese is melted, 10-12 minutes.  Once cheese is melted, top with chorizo and place under the broiler for 1 or 1 1/2 minutes, only until cheese is starting to brown.

Serve warm with your favourite salsa.

Serves 2.

Comment

Straight from Yucatán, Cochinita Pibil is outrageously delicious.

February 6, 2022 Maria Garza

As I sit here writing this post, I am amazed that I have not yet shared the recipe for Cochinita Pibil! After Enchiladas Suizas, Cochinita is my second favourite food - not only because it is delicious, but also because it is another dish my Nanny made for us on a regular basis. Those food memories are special and whenever I make this pork in annatto seed sauce I am transported immediately to my childhood kitchen table. Nanny used to make the pork and serve it in the form of saucy tacos along with a mound of white rice and black beans. So, so good!

Cochinita Pibil comes from the Mayan world, in the Yucatán Peninsula, where it is their most famous and popular dish. The name Cochinita refers to the pig, and the word Pibil comes from the Mayan word Pib, that means cooked in the ground oven. The original and best cochinita is cooked in a pit, over wood embers, the vessel covered with banana trunk pieces, then banana leaves, and finally a thin metal sheet covered with dirt. The pork itself is bathed in a mixture made from achiote (annatto seeds), sour orange, salt, cinnamon, cloves and garlic, which colours it a bright orange thanks to the annatto. It is then wrapped in banana leaves, covered, and placed in the pib.

Depending on the size of the meat, it takes anywhere from 3-4 hours to cook. It is traditionally made in the wee hours of the morning, so it is ready to eat first thing, usually on Sundays and holidays. It is the best breakfast ever!

The one and only condiment cochinita needs is a crown of brightly coloured pickled red onions, macerated in the same sour orange, salt and a bit of Mexican oregano, spiked with tiny pieces of Habanero chile. A freshly made corn tortilla to wrap it all in and you will be transported to foodie heaven.

If you ever find yourself in the Yucatán, take a drive to the countryside… you will most certainly come across a roadside restaurant that serves freshly baked Cochinita. STOP - because you must - and TASTE. It will be one of the best experiences - there is nothing like it. Simple ingredients transform the pork into something rich, luxurious and decadent. Trust me when I say it is one of the best tacos you will ever have.

As amazing as that sounds, you may not be able to travel to Mexico anytime soon, but the good news is you can make this at home! You don’t need to have the Pib in your backyard to be able to enjoy Cochinita. It is pretty easy to make.

If you have the time, I recommend you marinate it, then bake it low and slow, to coax all those flavours out of the pork. But if you’re strapped for time, you can make this in the pressure cooker or Instant Pot. You can buy achiote paste in your local Latin grocer, and if you cannot find sour oranges (these are harder to find), combine orange and grapefruit or lime juice to give you an approximation of flavour (I tend to prefer orange and grapefruit, as I enjoy its slight bitterness). Banana leaves are also available at Latin or Asian grocers, usually found in the freezer, but if you cannot find them, don’t stress, you can still make this without them. Finally, epazote (fresh or dried) is optional, but it is really delicious here. You may want to double up on the pickled onions, as they are really good in sandwiches or tortas - I like to keep a jar in the fridge for those occasions. One last thing, make sure you have plenty of corn tortillas for this party. If you like, make a pot of rice and some black beans and you will have an amazing meal.

Buen provecho!

Cochinita Pibil
Pork in Annatto Seed and Bitter Orange Juice

1/2 banana leaf, cut into large pieces
1.5 kg pork shoulder (pork butt) roast, cut into large chunks (I like to use boneless)
5 Tbsp achiote paste 
6 cloves garlic, chopped
2-3 tsp salt, to taste
4 cups sour orange juice, or a combination of orange juice and grapefruit juice
1 sprig epazote, or 1 tsp dried epazote (optional)

Mix the achiote paste, garlic, salt and juice until well combined. Mixture should taste really well seasoned, if it needs more salt, add some more. This can be done in the blender if achiote paste is too hard. Let meat marinate in this mixture, refrigerated, for a minimum of 2 hours, preferably overnight. 

Line slow cooker bowl with banana leaf, if you’re using it. Place meat on banana leaf and pour marinade liquid over meat. Sprinkle with epazote. Cover with another piece of banana leaf, tucking ends in securely. 

Cook, covered, on Low setting for about 10 hours, until tender, then shred meat and leave in juices. Taste for salt and add more if needed. Continue to cook, covered, on Low setting for up to another 2 hours. Serve with pickled onions.

If you don’t have a slow cooker, this can be done in pressure cooker - cooked on high pressure for 40 minutes. In the oven, cover pan with foil over the banana leaves and braise at 300°F for 3-4 hours, until meat is very tender. 

Pickled Red Onions:

6 Tbsp white vinegar, or equal parts of orange and lime juice
Salt to taste
1 medium red onion, cut into thin julienne (about 1 1/2 cups)
1 Habanero chile, seeded and thinly sliced or minced
1/2 tsp Mexican oregano

In bowl combine vinegar or juices and salt to taste.
Mix in onions and oregano.
Marinate at least 1 hour, stirring every so often.

Serves 6-8.

2 Comments

Chicken Tostadas are fast, delicious and always a crowd pleaser.

January 30, 2022 Maria Garza

When I was a kid in Mexico, Tostadas would make an appearance at the lunch or supper table at least once a week. They were also a favourite item for birthday parties or get-togethers, because they are super easy to assemble, and everyone likes them. Best of all, your guests can build their own with their favourite toppings.

It is not a surprise that in my household, whenever there is leftover chicken, Tostadas end up on my plate (if you have leftover rotisserie chicken, then this is the perfect vehicle for that!). I usually have tortillas and beans in the fridge, and the toppings can be anything you like, from the customary fresh lettuce, tomato and avocado with the crumbly cotija and crema, but you can also make a warm tostada with melted cheese instead of cotija. If you don’t have chicken, you can use leftover steak (search for that recipe here in the blog) - you get the picture, Tostadas are a vehicle for delicious bits of (leftover or freshly prepared) food. One thing though, always serve them with salsa or pico de gallo and crema, whether you go for the fresh toppings or the gooey, melted cheese.

Now that we sorted out the toppings, let’s talk about the tostada itself. You can buy commercial tostadas, which are very convenient since they’re ready to go. But if you don’t happen to have those available, toasting your own tortillas is very easy. Simply put them on a comal over medium low heat and warm up, turning often, until completely crispy. If you prefer, you can fry them in hot oil, turning every few seconds, until crispy. The dry toasting yields a drier, crunchier tortilla, while the fried tortilla is moister. So you decide which method you like, they are both delicious!

Next time you find yourself wondering what to make for dinner, make some tostadas. Your family will love them!

TOSTADAS DE POLLO
Chicken Tostadas

2 chicken breasts, poached and shredded finely
2 cups refried beans
1 large tomato, diced
1 large avocado, diced
2 cups shredded lettuce
1 cup crumbled cotija or Feta cheese, or grated Monterey Jack cheese
1/2 cup crema, crème fraîche or sour cream
Salsa of your choice
8 commercial tostadas or tortillas that have been fried until crispy 

Warm tostadas in the oven for a couple of minutes.

Spread warm beans on each tostada. 

Top with chicken and garnish with tomato, avocado, lettuce, cheese, crema and salsa.

Serve immediately.

Serves 4.

Comment

Rajas in a Creamy Tomato Salsa makes for a very satisfying meal.

January 23, 2022 Maria Garza

It’s been bitterly cold here in Ottawa these last few days, so much so that on the weekends I feel like hibernating. My fridge is starting to look a little bare, but there is no way I’m going out in this cold!

I look in my crisper and I see two poblanos starting to get a little old, so I decide to make something with them. The obvious choice is Rajas con Crema, because poblanos and cream are a match made in heaven. The problem is, I don’t have a lot of crema, and no queso fresco… so I look around and see some tomatoes that are also getting pretty wrinkled, and an idea starts to take shape.

My creation process is often like this - look around, see what I have and think of the possibilities. I roast the poblanos, peel and devein and cut into strips. I want to use those tomatoes, and the way it has to be is in some sort of salsa, so I decide to cook the salsa ingredients first in a bit of oil, then blend. This process gives the salsa a creaminess, because the oil is emulsified into the sauce and it’s delicious!

After that it’s time to sauté the onion and poblanos until starting to get golden and then add the corn. The salsa goes in for a second cook and when it’s simmering, I add the cream. At first that was going to be the end of it, but once I added cream a light went on and I decided to add melty cheese.

Oh yes, that cheese at the end transformed this dish into something else altogether. Now it reminded me of another dish we often had at home - Queso con Tomate, which is salsa warmed up in a frying pan with cheese stirred in until melted, then eaten with tortillas (my sister Pilar’s favourite). As soon as I had a taste I knew this was a keeper.

This is perfect with tortillas for making tacos, but it is equally delicious as a dip. That is how I ate mine last night, but I suggest if you are going to make it to eat with chips, cut the poblanos and onions into smaller pieces, so it is easier to scoop. Either way, I hope you try this and let me know what you think!

Rajas con Crema en Salsa
Roasted Poblano Strips in Creamy Salsa

2 medium poblano chiles
2 Tbsp oil, divided
1 garlic clove, sliced
1/2 - 1 Jalapeño chile, chopped
2 Roma tomatoes, chopped
1/4 cup water
Salt to taste
1/4 white Spanish onion, julienned (about 2/3 cup)
1/2 cup corn kernels
1/3 cup crema or sour cream
1 cup Monterey Jack cheese, shredded
Cilantro leaves and crumbled cotija or feta cheese for garnish
Corn tortillas or tortilla chips

To roast poblano chiles: 

Place chiles on tray and place a few inches under the broiler and cook until nicely charred, turning as needed.

If you have a gas stove, you can place the chiles right on top of the burners and char, turning often, until blistered all over. This can also be done on the barbecue.

Once chiles are blistered and charred, place in a bowl and cover so they can steam. When they are cool enough to handle, peel them, open them and remove all the seeds and veins. Cut them into strips.

In medium saucepan, heat 1 Tbsp oil and sauté garlic and Jalapeños until golden, but make sure the garlic does not burn. 

Add tomatoes and cook for about 5 minutes, then add water and cook for another 5 minutes.

Place tomato mixture in blender jar and add a bit of salt to taste. Blend until completely smooth.

In same saucepan, heat remaining Tbsp oil and sauté onion and poblano strips until the onion is very soft and starting to brown. Add corn kernels and crema. Cook until simmering gently and add Monterey Jack cheese. Stir only until melted.

Serve, garnished with cotija or feta cheese and cilantro leaves.

You can make tacos or serve as a dip with tortilla chips.

 Serves 2-3.


Comment

Black Bean Soup has never been so comforting.

January 15, 2022 Maria Garza

You would never think a humble bowl of black beans would be one of the most amazing and comforting meals out there, but believe me, it is!

Mexicans have known this for centuries - beans and masa are a match made in heaven, so much so that when you eat these two things together, you are eating a complete protein - plant based protein for the win! These two ingredients have been the staple in Mexican households forever, and as humble as they are, they are nutritious and very delicious.

It all starts with a pot of home cooked beans. It is the easiest thing to do so please don’t be intimidated by it. I often say that when Mexicans get married, one of the first gifts they receive is a pressure cooker - you need it to cook your beans! But if you don’t have one, it’s OK - cooking beans the old-fashioned way, on top of the stove makes the most delicious and creamy beans ever! I like to add epazote leaves, garlic cloves and onion to my beans as they cook - this flavours them from the inside out. Another trick is to salt your beans towards the end of the cooking time - doing this will prevent your beans from having a tough skin.

Make a pot of beans and then make this black bean soup with chochoyotes. The beans will be absolutely delicious on their own, but if you go a step further and turn this into a soup and add the little masa dumplings, you will be doing a happy dance, trust me!

Chochoyotes could be called the Mexican dumplings. A mixture of corn masa, rendered lard, a bit of salt and cilantro, they are shaped into balls with a little dent - like a belly button. They cook happily in the soup and as they cook, they also thicken the liquid slightly. It is really an amazing combination than I invite you to try!

Chochoyotes can enhance in any brothy mixture - from chicken soup to mole! As long as there is enough broth to allow them to cook. If you are using them in a thicker mole, you may want to cook them separately (in chicken broth is the best!) and then add them to the final dish.

This black bean soup is filling, comforting and very delicious. As I write this in Ottawa, the temperatures outside are below -30°C, so eating a bowl tonight felt just perfect.

I hope I have inspired you to make beans at home and then use some to make this soup. If you prefer to make it with pinto beans, that would also be really good too!

FRIJOLES
Beans

2 cups pinto or black beans
8 cups water
Salt to taste

Pick through beans (sometimes they have little stones).  Place in a deep pot and add water.  Cook on medium heat, partially covered, for 2-3 hours, adding water as necessary.  After they are soft, salt to taste.
A pressure cooker can be used: cook on high pressure for about 45 minutes. A crock pot can be used as well: cook on “Low” for 8 hours.

SOPA DE FRIJOL NEGRO CON CHOCHOYOTES
Black Bean Soup with Masa Dumplings

For the Chochoyotes:
1/2 cup Maseca
1/2 cup warm water
1 Tbsp rendered lard or vegetable shortening
1/4 tsp kosher salt
1 Tbsp chopped cilantro

For the Soup:
1 Tbsp rendered lard, oil or butter
1 small onion, chopped (about 1/2 cup)
1 Tbsp ancho chile powder (optional but delicious)
1 small clove garlic, minced
2 cups cooked beans 
3 cups bean broth
Sliced avocado, crumbled cotija or feta cheese, cilantro leaves and salsa for garnish

To make the chochoyotes, in medium bowl combine Maseca and warm water. Bring together to make a soft dough and knead in lard, salt and cilantro. Make sure everything is evenly distributed and then divide masa into 12 or 13 pieces. Make round balls and then using your thumb, make small indentations in the centre, they will look like belly buttons. Reserve until soup is simmering.

To make the soup, heat lard in medium saucepan. Cook onion and ancho chile powder until fragrant and onion is soft. Add garlic and cook about 2 minutes. 

Add 1/2 cup of the beans and using a potato masher, mash to a semi-smooth consistency. Add the rest of the beans and the bean broth and add salt if needed. Bring mixture to a slow boil.

Add chochoyotes and simmer in the soup for 6-8 minutes, they will sink at first (just like gnocchi), but will rise to the surface when cooked.

Serve soup, garnished with avocado, crumbled cotija or feta cheese, cilantro and salsa. 
If you like, you can add crema as well. 

Serves 2-3.

Comment

When you feel like something green, this Salsa Aguacatada hits the spot.

January 9, 2022 Maria Garza

Every winter, about this time of year, I crave GREEN stuff. It could be a simple salad (I’m not sure why when the weather turns chillier my desire to eat salad goes down), or it could be some goodness in the form and shape of avocado - that amazing creamy, satisfying, buttery fruit. If you add some tomatillos, cilantro and jalapeños, well… we have all sorts of delicious green stuff.

This recipe comes from my sister Lucía - during a casual conversation a few years ago she told me about this way of making salsa. It is like a cross between a simple blended guacamole and a green tomatillo salsa. You can eat it with chips, on tacos or flautas, and it is absolutely addictive. It definitely falls into the “green” category and it is delicious and super easy to make.

Once you make it you will find yourself secretly snacking on it with corn chips (no one will fault you for that!). It keeps well in the fridge for at least 5 days (if it lasts that long), because the acidity in the tomatillos keeps the avocado from oxidizing. Next time you find yourself with a couple of lonely avocados languishing in the fridge and a few tomatillos, give this salsa a try, your corn chips will thank you!

SALSA AGUACATADA
Avocado Tomatillo Salsa

6 tomatillos, husked, cleaned and cut into quarters
2 small ripe avocados, peeled and cut into chunks
1/4 cup onion, chopped
1 small garlic clove, peeled
1 Jalapeño chile, stemmed and chopped (seeded if you want less heat)
1/2 cup chopped cilantro
1/4 cup water (as needed)
Juice of half a lime, or to taste
Salt to taste

Place tomatillos, avocado, onion, garlic, jalapeño and cilantro in the blender and process until very smooth. Add water as needed to make a smooth sauce. Season to taste with lime juice and salt. 

Makes about 2 1/2 cups.

Comment

Braised Beef Ribs are perfect New Year's Eve fare!

December 29, 2021 Maria Garza

As I write this we are heading into the new year. As unbelievable as it is to be on the last days of the year, I think back to last January on what would be our second year into this pandemic. The year loomed as interminable, and now it’s all but done; and still, it feels as if not a lot has changed in these 12 months. It may seem like we have not advanced much in terms of the state of affairs with Covid-19, but we have. In Canada, we have a high vaccination rate, and now we’re getting the third (booster) shot. I am one of the ones that got covid and the Delta variant hit me pretty hard. Omicron seems to be affecting people in a very mild way, which gives me hope - and I don’t know why I feel this, but I feel and really hope this will be the turning point, that as many more people get infected with Omicron, we will achieve herd immunity and slowly but surely we will be moving on through this.

I really hope that we start the new year with lots of hope for the future. But before we get there, let’s talk about food that you can and should make for new year’s eve! I know we will not be gathering in large groups, so this is a beautiful dish you can serve your small family. Best of all, you can make it ahead of time so the night of your dinner you can relax and have some bubbly as your meal warms up in the oven.

This recipe is very easy, but it looks and tastes like you spent hours preparing it. Let’s start with the meat - get yourself the biggest chunk of boneless beef ribs - mine were 2 1/2” thick. I cut the chunk into 4 pieces for a perfect serving size. After that, you need salsa ingredients, a bit of pure ancho chile powder, Mexican oregano and a lager beer - I like to use Dos Equis.

The hardest thing about this is being patient while browning the beef. Please make sure you give it a ton of colour, as that will give you lots of flavour. Blend the salsa ingredients with the ancho and oregano, and that goes in with the meat after it’s been browned. Cook that salsa for a few minutes and then add the beer. After that, it cooks long and slow… to give that meat the chance to get fall-apart tender while it’s permeated with the flavours in the sauce. I tell you, this is a thing of beauty.

Making this a day or two ahead has its benefits, first of all, you can have a hands-off dinner, but on the practical side, the beef is pretty fatty, and that fat will render out into the sauce. Chilling the sauce will make all that fat solidify at the top so you can easily remove it the next day, and eating it that way is nicer in the end.

All you have to decide is what to serve with this. You can go the traditional way and make some mashed potatoes, or roast some carrots and chayote squash. It can be a simple but elegant dinner.

I hope you have a wonderful intimate celebration with your family and most of all, I wish you a healthy, happy, successful 2022, full of adventures and much love!

Costillas de Res en Salsa de Chile Ancho a la Cerveza
Braised Beef Ribs with Ancho Chile Salsa and Beer

2 Tbsp vegetable oil
850g boneless beef rib, cut into 4 pieces
1 large tomato, chopped (2 1/2 cups)
1/4 white Spanish onion, chopped (2/3 cup)
2 large garlic cloves, peeled and chopped
2 Tbsp ground ancho chile powder
1 tsp Mexican oregano
Salt and pepper to taste
1 lager beer (I like Dos Equis)

Season meat with salt and pepper. In Dutch oven, over medium high heat, add oil and brown meat on all sides, make sure you give it enough time to get a nice brown colour all over.

Meanwhile, in blender jar place tomato, onion, garlic, ancho powder and Mexican oregano. Blend until completely smooth.

When meat is browned, add blended sauce and salt and pepper to taste.

Turn heat down and let sauce simmer for about 10 minutes. Add beer and stir it in. Bring sauce to a low boil and then simmer, covered, until meat is tender, 1 1/2 to 2 hours. Check meat every 15 minutes or so, making sure sauce is not sticking. If liquid evaporates too much, add water, 1/2 cup at a time, to keep the meat braising.

When meat is fall-off-the-bone tender, adjust seasoning on the sauce. If you prefer a thicker sauce, remove meat from pan and reduce sauce to your desired consistency.
Serve with your favourite vegetables.

* If you have a pressure cooker or a slow cooker, you can certainly make this dish in these. In the pressure cooker, it would take about 35 minutes at full pressure. In the slow cooker, it would take 8 hours on low.

Serves 4.

Comment

Caldo de Pollo is perfect when you're not feeling well.

December 5, 2021 Maria Garza

Hi everyone, I have been absent from all social media for a while. As you may know, I lost my beloved nephew Iñaki a few weeks ago and after that I lost all my desire to share anything. I had decided to take time “off” to allow myself to grieve. To add insult to injury, I contracted Covid-19 and if you’ve never had it, let me tell you, it takes everything out of you.

I am thankful that I am double vaccinated, so my symptoms were not that severe, but still, it is not easy to go through covid all by yourself. In essence, we are all alone and isolated when we go through this, but in my case, since I live alone, it was even worse. Physically, it knocks you out completely, but psychologically it is really hard because you worry about anyone that you could have passed it onto. It is stressful and horrible and I don’t wish it on anyone. I have always been careful and follow social distancing guidelines, but it goes to show you that even if you are, you can get it. The other thing I realized is that vaccines DO work, so if you’re still on the fence, I really recommend you go out and get the jab.

While I was sick, even though my appetite was nonexistent, I needed to force myself to to eat. They tell you to eat protein and stay hydrated, so I went through my fridge and managed to make myself a huge pot of chicken soup, and that’s pretty much what I ate for 7 days straight. Thankfully, I went through it as if I had a really bad flu, chills at night, congestion, dry cough, really bad headaches, extreme exhaustion and loss of sense of smell and diminished sense of taste (that is really scary but especially for a chef!).

Three weeks later, I am starting to feel more like myself, though I’m still tired. I was able to go back to work and my appetite is starting to come back. I am pushing myself to get back to my routines, and this weekend I made another pot of chicken soup. Something about the comfort it brings makes it really appealing especially since the snow has started to fall here in Ottawa.

This recipe is super easy to make, so much so you can even make it while you’re sick. It is very similar to Caldo Tlalpeño, but the ingredients are a bit different. You can add whatever veggies you have on hand. I love adding the usual items like carrots and potatoes, plus some chayote, green beans and zucchini. If you have corn on the cob, you can add small rounds of that as well.

To serve, I like to cook a pot of rice so I can add a spoonful to my bowl of soup (that is a very Mexican thing to do). The usual and best garnishes for this bowl of goodness are chipotle chiles and lime juice, but a few slices of avocado are amazing too.

I hope you make a big pot of chicken soup this winter. Please take care of yourself and stay safe out there, especially with this new Omicron variant.

Caldo de Pollo y Verduras
Chicken  and Vegetable Soup

2 litres good quality chicken stock
1 medium carrot, peeled and sliced thinly
1/4 white Spanish onion, sliced thinly
2 stalks celery, sliced thinly 
1 small chayote squash, peeled and diced
2 small white potatoes, peeled and diced
Salt to taste
1 medium zucchini, trimmed and sliced thinly
1 handful green beans, trimmed and cut into 1” lengths (about 1 cup)
2-3 cups pulled cooked chicken (from a rotisserie chicken works great)
1/4 cup chopped cilantro

Garnishes:
Lime wedges
Chipotle Chiles in adobo
Cooked Mexican rice

In 6 quart stock pot, place chicken stock and turn heat on medium high. Add carrots, onion, celery, chayote and potatoes, along with salt to taste.

Bring to a low boil, then turn heat down and simmer until vegetables are just cooked, 25-30 minutes.

Add zucchini, green beans and pulled chicken and simmer another 10 minutes, only until zucchini and beans are tender.

Add cilantro and serve bowls with a spoonful of rice, and chipotles and limes on the side.

Serves 6. 

Comment
← Newer Posts Older Posts →

Copyright © 2025 The Cultural Kitchen
All Rights Reserved

1936 Ranchwood Way Orleans, Ontario K1C 7K7
613.762.0940